Month: April 2025

oem golf shaft replacement guide

Discover the essential steps and benefits of replacing your golf club’s OEM shaft to enhance performance, consistency, and overall play. Learn how to upgrade your game with precision.

Why Replace Your Golf Shaft?

Replacing your golf shaft can significantly enhance performance, consistency, and overall play. Over time, shafts may deteriorate, affecting accuracy and distance. Upgrading to a new shaft can address issues like excessive stiffness, flex, or weight, tailoring the club to your swing dynamics. Additionally, modern shafts offer advanced materials and technologies for improved feel and distance. Whether your shaft is damaged or outdated, a replacement ensures optimal performance, aligning with your evolving golfing needs and preferences.

Understanding OEM Shaft Specifications

OEM shafts are designed to meet exact manufacturer specifications, ensuring consistency and performance. Each shaft is engineered with specific flex ratings, weights, and materials tailored to the club’s design. Understanding these specifications is crucial for maintaining the club’s intended playability. Factors like tip size, hosel diameter, and MPF codes must align with the original equipment to ensure a proper fit and function. This attention to detail guarantees that your replacement shaft performs as intended, preserving the club’s integrity and your game’s consistency.

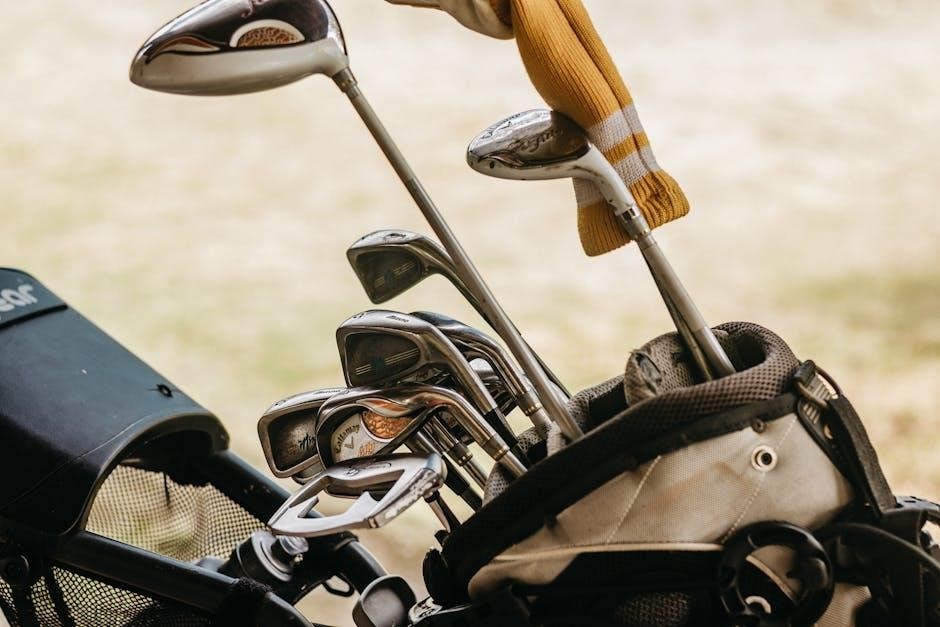
Identifying Your Current OEM Shaft

Accurately identifying your OEM shaft is vital for selecting the correct replacement. Inspect the shaft for markings indicating brand, model, flex, and material to ensure compatibility.

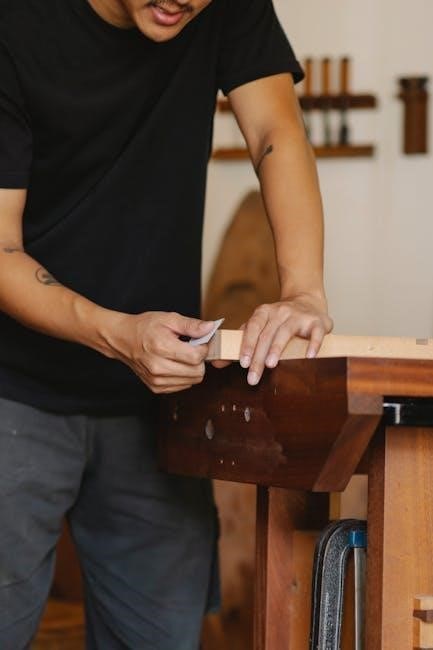
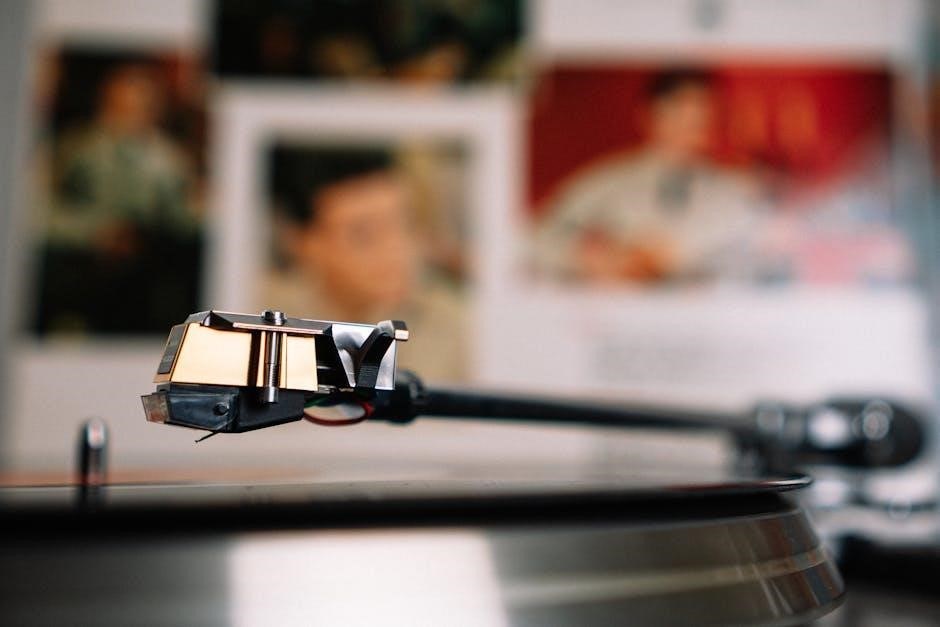
Inspecting Shaft Markings

Inspecting shaft markings is the first step in identifying your current OEM shaft. Most manufacturers print the brand, model, flex, and material near the grip or clubhead. Look for small engravings or labels that specify these details. This information is crucial for selecting the correct replacement shaft. If the markings are worn or illegible, consult the manufacturer’s guide or contact a professional. Accurate identification ensures compatibility and optimal performance, avoiding costly mistakes during replacement. Proper inspection sets the foundation for a successful OEM shaft replacement process.

Using Manufacturer Guides for Identification

Manufacturer guides are the most reliable resource for identifying OEM shafts. These guides provide detailed charts and databases listing specific shaft models, their corresponding club sets, and production years. By referencing these guides, you can accurately determine the original equipment specifications for your clubs. Many guides also include MPF codes and compatibility information, ensuring you select the correct replacement shaft. Always cross-reference the shaft markings with the manufacturer’s guide to avoid mismatches and guarantee optimal performance. This step is crucial for a seamless and effective replacement process.

Selecting the Right Replacement Shaft

Choosing the correct replacement shaft involves matching flex, material, and tip size to your club’s specifications. Use manufacturer guides to ensure compatibility and optimal performance, enhancing your game.

Considering Flex and Material Options

When selecting a replacement shaft, it’s crucial to consider flex and material options. Shaft flex (stiff, regular, senior) must match your swing speed for optimal performance. Materials like steel or graphite offer different benefits—steel for durability and graphite for lighter weight and increased distance. Use manufacturer guides to identify compatible options and ensure the shaft’s MPF rating aligns with your club’s specifications. Proper flex and material selection can significantly improve accuracy, distance, and overall playability, making it a critical decision in the replacement process.

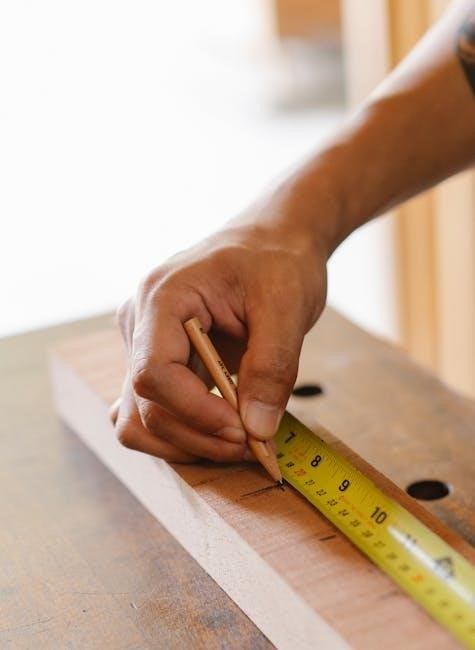
Matching Tip Size and Hosel Diameter

Precise measurement of the tip size and hosel diameter is essential for a proper fit. Use manufacturer guides or OEM charts to confirm compatibility. Ensure the new shaft’s tip size matches the clubhead’s hosel diameter to maintain integrity and performance. Incorrect sizing can lead to poor alignment or damage. Always verify specifications before installation to guarantee a secure and accurate fit, ensuring optimal club performance and longevity. This step is critical for achieving the desired results from your shaft replacement project.

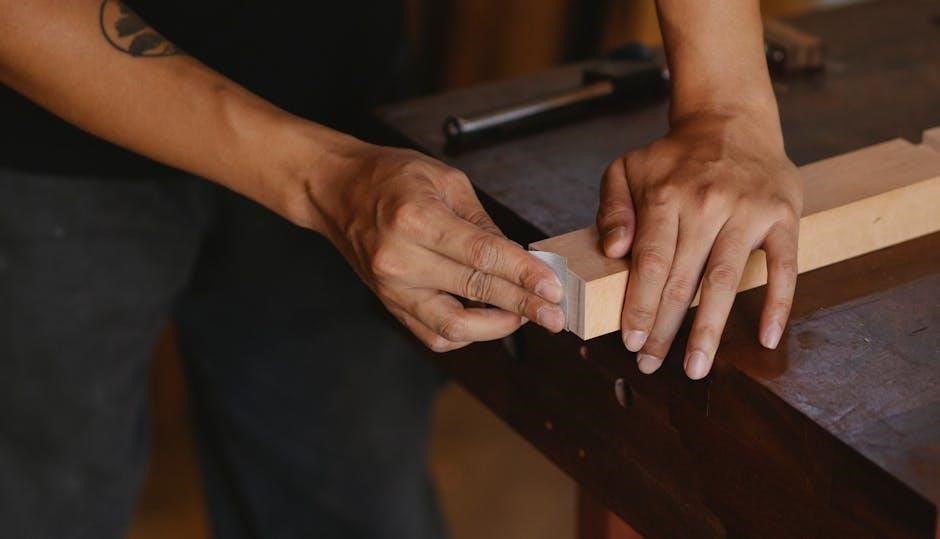
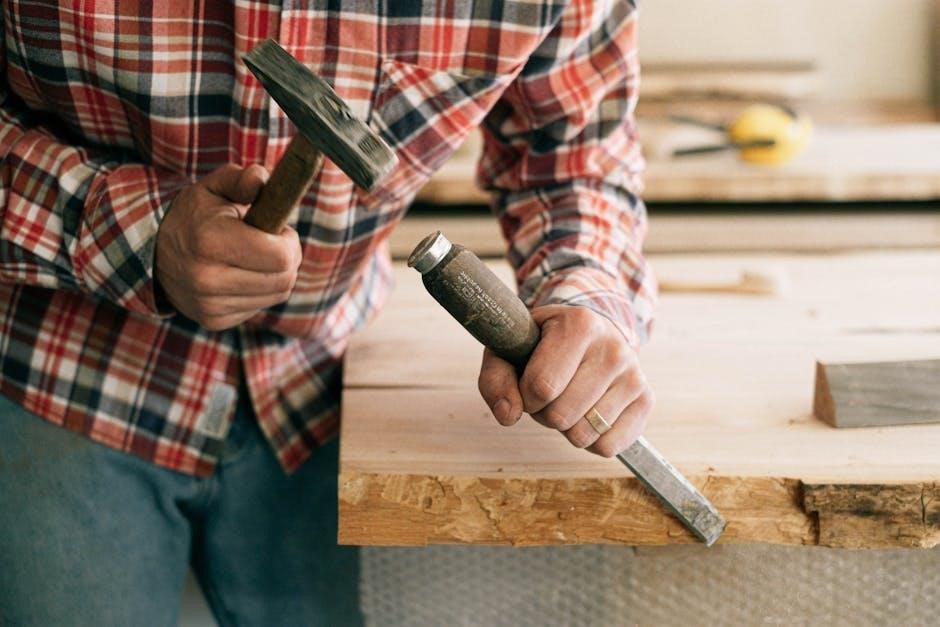
Tools and Materials Needed for Replacement

Essential tools include shaft pullers, heat guns, and epoxy. Materials like ferrules, grip tape, and adhesives ensure a secure and professional installation of your new OEM shaft.

Essential Tools for Shaft Removal and Installation

A shaft puller is necessary for safely removing the old shaft without damaging the clubhead or adapter. Heat guns are used to soften epoxy, ensuring a clean separation. Vice grips and alignment tools help secure the club during removal and installation. Epoxy and ferrules are critical for bonding the new shaft properly. A workbench or stable surface is recommended for precise handling. Having these tools ready ensures a professional and secure replacement process, avoiding potential damage to your equipment.

Adhesives and Epoxies for Secure Bonding

High-strength adhesives and epoxies are crucial for ensuring a secure bond between the new shaft and the clubhead. Apply a thin, even layer to the shaft tip and hosel, avoiding excess to prevent alignment issues. Allow the epoxy to cure fully, following the manufacturer’s instructions, for maximum durability. Flexible epoxies are ideal for absorbing vibrations, while high-strength options provide long-term stability. Proper bonding ensures consistent performance and prevents loosening over time, making it a critical step in the replacement process.

Step-by-Step Installation Process

Learn how to safely remove the old shaft, properly prepare the new one, and securely install it with precise alignment for optimal performance and durability.

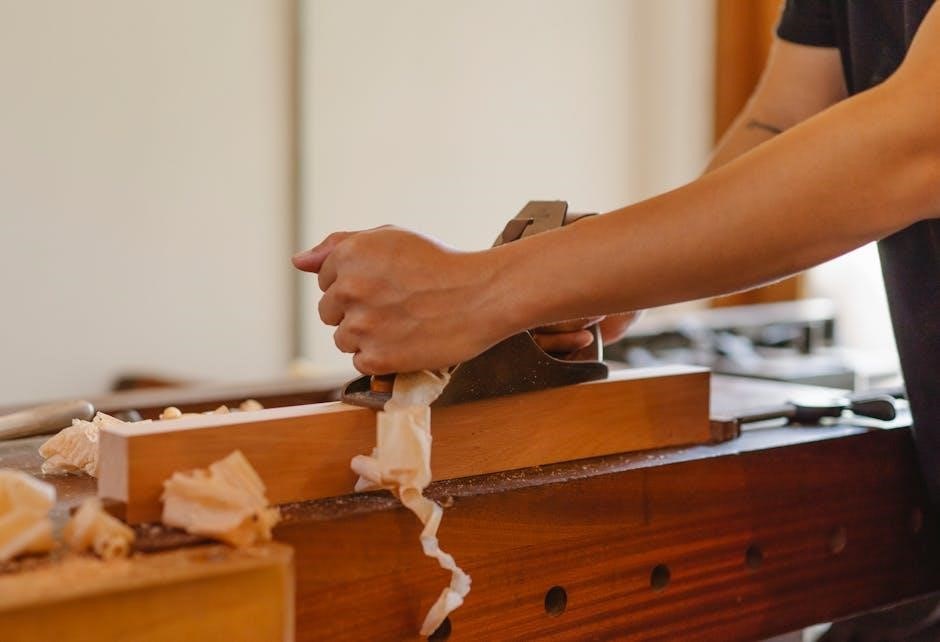
Removing the Old Shaft Safely

Begin by heating the hosel using a heat gun to soften the epoxy securing the shaft. Carefully apply gentle pressure while twisting the shaft back and forth to avoid damage. Use a shaft extractor or hydraulic press for stubborn shafts, ensuring the clubhead remains stable. Protect the surrounding area with towels or heat-resistant pads to prevent damage. Once loosened, remove the shaft slowly and inspect the hosel for any remaining adhesive, cleaning it thoroughly before installation. Safety and patience are key to avoid club damage.

Preparing the New Shaft for Installation

Before installing your new shaft, ensure it matches your club’s specifications, including flex, material, and tip size. Lightly sand the tip to roughen the surface, enhancing epoxy adhesion. Apply a thin, even layer of epoxy to theshaft’s tip, avoiding excess. Align the shaft with the clubhead’s hosel, double-checking for proper fit and orientation. Allow the epoxy to set slightly before final installation, ensuring a secure bond. Proper preparation guarantees a stable and durable connection, optimizing performance and longevity.

Installing the Shaft and Ensuring Proper Alignment

Once prepared, apply a thin, even layer of epoxy to the shaft’s tip and the clubhead’s hosel. Carefully insert the shaft, ensuring it aligns perfectly with the clubhead’s face. Use a laser or alignment jig to verify proper orientation. Gently rotate the shaft to spread the epoxy evenly, then hold it in place for a few seconds to set. Allow the epoxy to cure fully before handling the club.

After curing, inspect the clubhead and shaft for proper alignment and a secure bond. Ensure the shaft is seated correctly and the clubhead is square to the target line. Proper alignment guarantees consistent performance and accuracy, making the replacement process worthwhile.

Final Checks and Testing

After installation, perform a visual inspection to ensure the shaft is properly aligned and the epoxy bond is secure. Check for any excess adhesive and clean it up with a solvent. Use a frequency tool to verify the shaft’s flex characteristics match the manufacturer’s specifications.

Test the club with soft swings to ensure proper feel and performance. Finally, take the club to the range for on-course testing, observing ball flight and accuracy. This step ensures the replacement shaft meets your expectations and maintains consistent playability.

Cost Considerations and Budgeting

The cost of replacing a golf shaft varies based on the type of shaft, installation complexity, and whether it’s done professionally or as a DIY project. Average costs range from $30 to $100 per club.

Factors Affecting Replacement Costs

The cost of replacing a golf shaft can vary based on several factors, including the type of shaft, installation complexity, and whether you opt for a professional or DIY approach. High-end materials like graphite typically cost more than steel shafts due to their lightweight and performance benefits. Additionally, clubs with adjustable adapters may require extra labor, increasing the price. Professional installation fees can range from $20 to $50 per club, while DIY kits may save you money but require time and skill. Brand and quality also play a role, as premium OEM shafts are often more expensive than aftermarket alternatives. Understanding these factors will help you budget effectively for your replacement project.

DIY vs. Professional Installation

Deciding between DIY and professional installation depends on your budget, skill level, and time. DIY shaft replacement can save money but requires specialized tools and expertise, risking damage if done incorrectly. Professional installation ensures precision and reliability, with fees ranging from $20 to $50 per club, depending on complexity. For beginners, professionals are recommended to avoid costly mistakes, while experienced clubmakers can save by handling the process themselves. Consider your confidence and resources when choosing the best approach.

Maintenance and Upkeep After Replacement

Regularly inspect and clean your new shaft to ensure optimal performance. Store clubs properly and avoid extreme temperatures to maintain durability and longevity of the replacement shaft.

Caring for Your New Shaft

Proper maintenance ensures your new shaft performs optimally and lasts longer. Regularly inspect for dents or scratches, and clean with mild soap and water to prevent dirt buildup. Avoid harsh chemicals or abrasive materials that could damage the finish. Store clubs in a cool, dry place, away from extreme temperatures, to maintain shaft integrity. Use protective covers or headcovers to shield against impacts during travel. Follow manufacturer guidelines for specific care instructions, as some shafts may require additional attention. Regular upkeep helps preserve performance and extends the life of your investment.

Regular Inspections for Optimal Performance

Regular inspections are crucial to maintain your golf shaft’s performance and longevity. Examine the shaft for signs of wear, such as dents, cracks, or excessive wear near the tip or hosel. Check the ferrule and grip for looseness or damage, as these can affect alignment and control. Inspect the shaft’s finish for corrosion or faded markings, which may indicate age or exposure to harsh conditions. Address any issues promptly to prevent minor problems from becoming major repairs. Consistent checks ensure your clubs remain in top condition, delivering consistent performance on the course.

and Additional Resources

Successfully replacing your OEM golf shaft can significantly enhance your game’s performance. For further assistance, explore our detailed guides and manufacturer support resources available online.

Final Tips for a Successful Replacement

For a successful OEM shaft replacement, always start by inspecting your current shaft for damage or wear. Consider factors like flex and material to match your swing. Ensure the new shaft’s tip size and hosel diameter are compatible with your clubhead. Gather essential tools like a shaft puller and adhesives beforehand. Follow a step-by-step installation process, beginning with safe removal of the old shaft, preparing the new one, and securing it properly. Double-check alignment and perform final tests to ensure optimal performance. Regularly maintain and inspect your new shaft to prolong its lifespan and keep your game at its best.

Recommended Guides and Manufacturer Support

Consulting official OEM shaft replacement guides from manufacturers like Callaway, TaylorMade, and Ping ensures accuracy and compatibility. These guides provide detailed charts, MPF codes, and specifications to help you identify the correct replacement shaft. Resources like Golfworks offer comprehensive tools and charts to simplify the process. Always refer to manufacturer support for the most reliable information, as they often list approved replacement options and compatibility details. This ensures your new shaft meets the original club’s performance standards and extends its lifespan. Utilize these guides to make informed decisions and achieve optimal results.

back and biceps workout pdf

Combining back and bicep exercises enhances strength, posture, and aesthetics. This structured approach saves time while targeting two critical muscle groups, promoting balanced development and improved metabolism.

1.1 Importance of Targeting Back and Biceps Together

Training back and biceps together is efficient and effective, as these muscle groups often work in unison during compound movements. Strengthening the back improves posture and overall athleticism, while developing the biceps enhances arm functionality and aesthetic appeal. This combination also maximizes workout time, allowing for balanced muscle growth and improved metabolism. Focusing on these areas together ensures a well-rounded upper-body development, making it a cornerstone of many fitness routines.

1.2 Benefits of a Structured Workout Plan

A well-organized workout plan ensures consistency and progress, helping you build strength and muscle effectively. It provides clarity on exercises, sets, and reps, saving time and reducing confusion. A structured plan also promotes progressive overload, allowing you to gradually increase intensity. This approach supports balanced muscle development and prevents plateaus. By following a clear routine, you can track progress, stay motivated, and achieve your fitness goals efficiently. Consistency is key, and a structured plan helps maintain discipline and focus.

Key Exercises for Back and Biceps

Focus on compound movements like pull-ups, rows, and deadlifts for back strength, and curls for biceps. These exercises effectively target both muscle groups simultaneously, enhancing overall development.

2.1 Back Exercises: Pull-Ups, Rows, and Deadlifts

Pull-ups are a cornerstone of back training, engaging the lats, rhomboids, and traps for a strong, broad back. Bent-over barbell and dumbbell rows target the middle back and shoulders, while deadlifts work the entire posterior chain, including the lower back. These exercises are essential for building muscle mass and improving posture. Proper form is critical to avoid injury and maximize results. Incorporating variations like wide-grip pull-ups or deficit deadlifts can further enhance muscle engagement and overall development.

2.2 Bicep Exercises: Curls, Hammer Curls, and Concentration Curls

Bicep curls are a fundamental exercise for building arm size and strength, targeting the biceps brachii. Hammer curls emphasize the brachialis and forearms, providing a well-rounded arm development. Concentration curls isolate the biceps, minimizing cheating and maximizing muscle engagement. These exercises, when performed with proper form and progressive overload, are essential for achieving sleeve-bursting biceps. Incorporating variations in grip and cable machines can further enhance hypertrophy and ensure a balanced bicep workout.

Warm-Up and Preparation

A dynamic warm-up prepares the back and biceps for intense workouts, preventing injuries and enhancing performance. Include arm circles, torso twists, and light cardio for 10 minutes.

3.1 Dynamic Stretching for Back and Biceps

Dynamic stretching is essential for preparing the back and biceps before a workout. Start with arm circles, torso twists, and leg swings to improve flexibility and circulation. Perform 10-15 repetitions of each exercise, focusing on controlled movements. Incorporate shoulder rolls and cat-cow stretches to loosen the upper back and spine. Avoid overexertion; the goal is to warm up, not fatigue. This routine enhances range of motion and reduces injury risk, ensuring a safe and effective workout session.

3.2 Importance of Proper Form and Equipment

Maintaining proper form during back and bicep exercises is crucial for maximizing results and preventing injuries. Use equipment like barbells, dumbbells, and resistance bands based on your fitness level. Ensure your spine stays neutral and engage core muscles for stability. Incorrect form can strain joints or muscles, leading to setbacks. Always prioritize controlled movements and adjust weights to maintain proper technique throughout each exercise. This focus on form enhances efficiency and ensures a safe, effective workout experience.

Advanced Training Techniques

Supersets and progressive overload enhance muscle growth and strength; These techniques maximize efficiency, targeting back and biceps effectively while minimizing rest periods and increasing intensity over time.

4.1 Supersets for Maximizing Muscle Growth

Supersets are a powerful technique to boost muscle growth by performing two exercises back-to-back without rest. For back and biceps, pair pull-ups with dumbbell curls or rows with hammer curls. This approach increases time under tension, enhances metabolic stress, and saves time. Focus on compound movements for the back first, then isolate the biceps. Aim for 3-4 supersets per muscle group, resting 60-90 seconds between sets. This method is ideal for those seeking efficient, intense workouts to maximize hypertrophy and strength gains. Proper form is crucial to avoid injury and ensure effectiveness.

4.2 Progressive Overload for Strength and Size

Progressive overload is a cornerstone of muscle growth, involving gradual increases in weight, reps, or intensity. For back and biceps, aim to add weight or reps weekly. Start with lighter loads to master form, then progressively challenge your muscles. Incorporate compound lifts like deadlifts and pull-ups, and transition to isolation exercises for targeted growth. Consistency is key—track your progress and adjust weights or reps to continue making gains. This method ensures sustained muscle development and avoids plateaus, helping you build both strength and size effectively.

Nutrition and Recovery

Proper nutrition and recovery are vital for muscle growth. Ensure high-protein intake, sufficient rest, and quality sleep to optimize muscle repair and recovery after workouts.

5.1 Protein Intake for Muscle Repair and Growth

Adequate protein intake is essential for muscle repair and growth. Aim for 1.6-2.2 grams of protein per kilogram of body weight daily. Include lean sources like chicken, fish, eggs, and plant-based options. Timing matters; consume protein within an hour post-workout and spread intake throughout the day; Supplements like whey protein can help meet daily goals, ensuring muscles recover and grow effectively after back and bicep workouts.

5.2 Rest and Sleep for Optimal Recovery

Rest and sleep are crucial for muscle recovery and growth. Aim for 7-9 hours of quality sleep nightly to support muscle repair. Rest days allow muscles to rebuild and strengthen, preventing overtraining. Poor sleep can hinder recovery and reduce muscle growth. Prioritize a consistent sleep schedule and create a relaxing bedtime routine. Incorporating rest days into your workout plan ensures your back and biceps have time to recover, optimizing the effectiveness of your training and promoting long-term progress.

Sample 8-Week Workout Routine

This structured 8-week plan is designed for consistent progress, balancing intensity and recovery. Perfect for both beginners and intermediate lifters, it helps build strength and size effectively.

6.1 Weekly Schedule and Exercise Breakdown

The routine is divided into 8 weeks, with specific exercises for back and biceps each week. Start with dynamic warm-ups, then focus on pull-ups, rows, and deadlifts for back strength. Include bicep curls, hammer curls, and concentration curls for arm development. Each workout includes 3-4 sets of 8-12 reps. Progress gradually by increasing weights or reps weekly. Ensure proper form and rest periods to avoid fatigue. Adjust the plan based on fitness level and goals for optimal results.

6.2 Adjusting Weights and Reps for Progress

Progressive overload is key to building strength and size. Start with manageable weights and gradually increase them weekly. Aim to add 2.5-5% more weight or perform an extra 2-3 reps each week. Rest for 60-90 seconds between sets to maintain intensity. Focus on proper form to prevent injury and maximize gains. Adjust the plan based on progress and recovery. Track your workouts in a log to monitor improvements and stay motivated over the 8-week cycle.

Cool Down and Stretching

Finish your workout with static stretches for your back and biceps to improve flexibility and reduce muscle soreness. Foam rolling enhances recovery and relaxes tight muscles.

7.1 Static Stretches for Back and Biceps

Static stretches are essential for cooling down after a back and biceps workout. Focus on stretches like child’s pose, seated forward bends, and bicep stretches to improve flexibility and reduce muscle tension. Hold each stretch for 20-30 seconds to maximize relaxation and prevent soreness. Incorporate deep breathing to enhance the benefits. These stretches target the latissimus dorsi, rhomboids, and biceps, promoting recovery and maintaining range of motion. Consistency in post-workout stretching ensures long-term muscle health and mobility.

7.2 Foam Rolling for Muscle Recovery

Foam rolling is a powerful tool for enhancing recovery after back and biceps workouts. By improving blood flow and breaking down muscle adhesions, it reduces soreness and stiffness. Focus on rolling the thoracic spine, latissimus dorsi, and biceps. Spend 1-2 minutes per muscle group, applying moderate pressure. Roll slowly and pause on tight areas to release tension. Incorporate this practice post-workout or on rest days to accelerate recovery and maintain muscle flexibility. Consistent foam rolling supports long-term muscle health and performance.

Downloadable PDF Guide

A comprehensive back and biceps workout PDF provides a structured plan with exercises, schedules, and tracking tools. Downloadable guides offer convenience, visual demonstrations, and organized progress tracking for optimal results.

8.1 Printable Workout Plan and Tracker

A printable workout plan offers a clear, organized schedule for back and biceps exercises. It includes detailed exercise breakdowns, sets, reps, and weight adjustments. The tracker allows users to monitor progress, ensuring consistency and motivation. This tool helps maintain accountability and provides a visual record of achievements, making it easier to stay on track with fitness goals. The PDF format ensures portability, allowing users to take their plan to the gym or use it at home for effective training and consistent results.

8.2 Visual Demonstrations of Exercises

Visual demonstrations provide clear guidance on proper form and technique for each exercise. Images or videos show how to perform movements like pull-ups, rows, and curls effectively. These visuals help users understand muscle engagement and avoid injuries. Detailed breakdowns ensure exercises are executed correctly, maximizing results. The PDF includes step-by-step illustrations, making it easier to follow along and achieve the desired workout outcomes. This feature is especially helpful for beginners learning proper form and intermediate lifters refining their technique.

strike pack manual

Welcome to the Strike Pack manual! This guide provides comprehensive instructions for setting up, operating, and optimizing your Strike Pack controller adapter. Learn about advanced features, paddle remapping, MOD classes, troubleshooting, and maintenance to enhance your gaming experience.

Overview of the Strike Pack

The Strike Pack is a cutting-edge controller adapter designed to enhance your gaming experience. Compatible with Xbox and PS4 controllers, it offers advanced features like paddle remapping, MOD classes, and customizable button layouts. This device allows gamers to optimize their controller for competitive play without altering the original controller itself. Its sleek design ensures seamless integration, providing a user-friendly experience for both casual and professional gamers.

Key Features of the Strike Pack

The Strike Pack boasts an array of innovative features, including paddle remapping, MOD classes, tournament mode, and rapid-fire capabilities. It supports customizable button layouts and anti-recoil settings, enabling precise control. The device is compatible with both Xbox and PlayStation controllers, offering seamless integration. Its advanced functionality enhances gameplay, making it a valuable accessory for competitive and casual gamers alike. The Strike Pack ensures a personalized gaming experience tailored to your preferences.

Installation and Setup

Install and set up your Strike Pack by following these steps: unbox the device, attach it to your controller, and pair it with your console. Ensure proper connection and pairing for optimal functionality. Refer to the manual for detailed instructions and troubleshooting tips to ensure a seamless setup experience.

Unboxing and Initial Setup

Start by carefully unboxing your Strike Pack and its accessories. Inside, you’ll find the Strike Pack device, a USB cable, and the user manual. Before use, ensure your controller is turned off. Attach the Strike Pack to the back of your controller, aligning the USB ports properly. Secure it firmly to ensure a stable connection. Once attached, turn on your controller and pair the Strike Pack with your console by pressing the Xbox or PS button, depending on your controller type. Follow the on-screen instructions to complete the pairing process. Ensure all connections are secure for optimal performance. Refer to the manual for detailed steps and troubleshooting tips to ensure a seamless setup experience.

Attaching and Pairing the StrikePack

To attach the StrikePack, align the USB ports of the StrikePack with your controller’s micro USB port. Gently slide it onto the controller and secure it firmly. Once attached, turn on your controller. The StrikePack will automatically enter pairing mode. On your console, navigate to the Bluetooth or accessory settings and select the StrikePack from the available devices list. Follow the on-screen prompts to complete the pairing process. Ensure a stable connection for optimal performance.

Operating Modes

The StrikePack operates in two primary modes: Tournament Mode and MOD Mode. Tournament Mode is the default setting, ensuring compliance with competitive gaming standards. MOD Mode unlocks advanced customization options for personalized gameplay experiences.

Tournament Mode

Tournament Mode is the default operating mode of the StrikePack, designed for competitive play. It ensures fair gameplay by disabling MOD functionality, making it ideal for official tournaments. When paired with your console, the StrikePack automatically starts in this mode, adhering to strict gaming standards. This mode maintains a level playing field, ensuring no unfair advantages are gained through advanced modifications. It’s perfect for players seeking a pure, unaltered gaming experience.

MOD Mode

MOD Mode unlocks the StrikePack’s full potential, enabling advanced customization and modifications. This mode allows users to activate features like anti-recoil, rapid fire, and custom button mappings. To switch to MOD Mode, hold the left select button until the LED indicators turn blue. Here, you can assign MODs to paddles, fine-tune settings, and create personalized profiles. MOD Mode is ideal for players seeking a tailored gaming experience with enhanced functionality. Use it to gain a competitive edge in your favorite games.

Mapping and Customization

Mapping and customization allow users to personalize their StrikePack experience. Assign paddles to any button, adjust button layouts, and create profiles for optimal gaming control and convenience.

Mapping the Paddles

Mapping the paddles on your StrikePack allows for seamless customization. Assign any button function to the paddles, enabling quick access without removing your fingers from the controller. Use the MOD button to enter customization mode. Cycle through profiles using the left paddle and select functions with the right paddle. Save your configurations for instant recall during gameplay, ensuring a tailored experience that enhances your performance and comfort.

Button Layout Adjustments

Button layout adjustments on the StrikePack allow you to customize your controller’s configuration. Press and hold the MOD button to enter customization mode. Use the paddles to navigate through button options and assign functions to suit your playstyle. Save your custom layout for quick access during gameplay. This feature ensures optimal control and comfort, making it easier to adapt to different gaming scenarios without compromising performance.

Menu Navigation

Navigate the StrikePack menu using the MOD button to access primary and secondary options. Use paddles to cycle through modes and adjust settings. Save configurations easily.

Primary Menu Navigation

Access the primary menu by holding the MOD button. Use the paddles to cycle through modes and settings. Highlight desired options with the directional pad. Save configurations by holding the MOD button again. This menu allows quick adjustments to button mappings, MOD classes, and operating modes. Default settings ensure seamless navigation for new users. Customize your StrikePack to match your gaming preferences for an optimal experience.

Secondary Menu Options

The secondary menu offers advanced customization options. Access it by holding the MOD button and the left paddle simultaneously. Here, you can adjust sensitivity levels, customize button mappings, and manage MOD classes. Use the directional pad to navigate and the paddles to select options. This menu also allows you to reset settings to default or enable expert modes for precise control. Explore these options to tailor your StrikePack for optimal performance.

Troubleshooting

The StrikePack may occasionally face connectivity or functionality issues. Common problems include power failures or button malfunctions. Check connections, restart devices, and consult the manual for solutions or contact support.

Common Issues and Solutions

Common issues with the StrikePack include connectivity problems, power malfunctions, and button unresponsiveness. Ensure the cable is securely connected and restart the device. For connectivity issues, unplug and replug the StrikePack. If buttons are unresponsive, check for debris or damage. Resetting the StrikePack or updating firmware can resolve persistent problems. Refer to the manual or contact support for further assistance. These solutions help restore functionality and optimize performance efficiently.

Resetting the StrikePack

To reset the StrikePack, hold the left select button (above the paddle) for 10 seconds until the LED lights flash blue. This restores default settings, resolving connectivity or functionality issues. After resetting, reconnect the device to your console and reconfigure any custom settings. Note that resetting does not delete saved profiles, ensuring your preferences remain intact for seamless gaming continuation.

Maintenance and Accessories

Regular maintenance ensures optimal performance. Clean the StrikePack with a soft cloth, avoiding harsh chemicals. For spills, use a dry cloth immediately. Explore recommended accessories like additional paddles and protective cases on the official website for enhanced functionality and durability.

Caring for Your StrikePack

Proper care ensures longevity and optimal performance. Clean the StrikePack with a soft, dry cloth, avoiding harsh chemicals. For spills, gently wipe with a dry cloth immediately. Store in a protective case when not in use to prevent scratches. Avoid extreme temperatures and moisture. Regularly inspect cables and connections for damage. Handle paddles and buttons with care to maintain responsiveness. Following these tips will keep your StrikePack functioning at its best.

Recommended Accessories

To enhance your StrikePack experience, consider these recommended accessories: a high-quality protective case to safeguard your device, a premium USB cable for reliable connections, and a compatible headset for immersive audio. Additionally, a controller skin can protect your controller while using the StrikePack. Visit the official Collective Minds website for authentic and compatible accessories designed to optimize performance and longevity of your StrikePack.

FCC User Manual

This section outlines FCC compliance and safety information for the StrikePack. Ensure proper usage to comply with FCC regulations and maintain device safety standards effectively.

Understanding the FCC Guidelines

The FCC guidelines ensure the StrikePack operates within legal frequency ranges, avoiding interference with other electronic devices. Compliance is verified through rigorous testing to meet safety standards. Proper installation and usage, as outlined in this manual, are essential to maintain compliance. Adhering to these guidelines prevents potential legal issues and ensures safe, efficient device operation. Always follow instructions carefully to uphold FCC regulations and enjoy optimal performance.

Compliance and Safety Information

The StrikePack is designed to comply with FCC guidelines, ensuring safe and reliable operation. Avoid exposing the device to water, extreme temperatures, or physical stress. Handle electrical components with care to prevent damage. Use only original accessories to maintain safety and functionality. Follow all instructions in this manual to avoid risks. Unauthorized modifications may void the warranty or pose safety hazards. Always adhere to manufacturer recommendations for optimal performance and user safety.

Advanced Functionality

Explore MOD classes, rapid fire, and anti-recoil features, designed to elevate your gaming performance. These advanced settings allow for customizable controls and enhanced precision in competitive play.

Using MOD Classes

MOD classes offer customizable modifications to enhance your gaming experience. Access the MOD menu by navigating through the Strike Pack’s menu system, typically involving specific button combinations or paddle controls. Each class allows you to adjust settings like rapid fire rates or anti-recoil compensation. You can have one MOD active per class to avoid conflicts. Apply changes by saving within the menu. Be cautious of online game policies regarding MOD use. Reset individual MOD settings to defaults if needed, without affecting the entire device. Experiment and customize to optimize your gameplay.

Enabling Rapid Fire and Anti-Recoil

To enable Rapid Fire and Anti-Recoil, access the MOD menu by holding the left select button until the LED indicators change. Navigate to the desired MOD class and select Rapid Fire or Anti-Recoil. Adjust settings using the paddle controls to customize fire rates or recoil compensation. Save changes to apply the MOD. Test in a game to ensure performance. Note that these features may be restricted in competitive play. Always adhere to game policies when using MOD functionality.

Comparing Strike Pack Models

The Strike Pack series offers models like the Dominator and Horizon, each tailored for different gaming needs; Compare features, compatibility, and performance to choose the best fit for your setup and preferences.

StrikePack Dominator vs. Horizon

The StrikePack Dominator and Horizon models cater to different gaming preferences. The Dominator excels for competitive play with rapid fire and anti-recoil, while the Horizon offers enhanced compatibility and MOD options. Both feature paddle remapping but vary in advanced settings and console support. Choose the Dominator for tournament-level performance or the Horizon for versatility and customization. Each model ensures optimal gaming experiences tailored to unique player needs.

Choosing the Right Model for Your Needs

Selecting between the StrikePack Dominator and Horizon depends on your gaming style. For tournament-level performance, the Dominator is ideal with its rapid fire and anti-recoil features. The Horizon offers enhanced customization and compatibility, perfect for players seeking versatility. Consider your console, gameplay preferences, and need for advanced MOD options when deciding. Both models ensure exceptional performance, so choose based on whether you prioritize competitive edge or adaptability.

The Strike Pack manual guides you through maximizing your gaming potential. With advanced features like MOD classes and paddle remapping, it enhances your controller’s functionality. Explore its capabilities to elevate your gameplay experience and enjoy a personalized gaming journey with the Strike Pack.

Final Thoughts on the Strike Pack

The Strike Pack is a powerful tool for gamers seeking enhanced controller functionality. With features like anti-recoil, rapid fire, and paddle remapping, it offers a competitive edge. Its user-friendly design and robust customization options make it ideal for both casual and professional players. The Strike Pack’s versatility and reliability ensure an improved gaming experience, backed by comprehensive support and resources for optimal performance.

raconte moi les sons pdf

This PDF guide introduces learners to French phonetics, focusing on oral and nasal vowels, consonants, and IPA transcriptions. It offers practical exercises for mastering French sounds effectively.

Overview of the Document

The “Racontes-moi les sons” PDF is a comprehensive guide designed to help learners master French phonetics. It systematically explores the sounds of the French language, covering both oral and nasal vowels, consonants, and their proper pronunciation. The document is structured into clear sections, each focusing on specific aspects of French phonetics, such as the classification of sounds, the role of the International Phonetic Alphabet (IPA), and practical exercises for sound recognition. With detailed explanations and examples, the guide provides learners with a thorough understanding of French pronunciation. It also includes resources and interactive exercises to reinforce learning, making it an invaluable tool for both beginners and advanced learners seeking to refine their skills in French phonetics.

Importance of Understanding French Sounds

Mastering French sounds is essential for effective communication and comprehension. Accurate pronunciation enhances fluency, helping learners express themselves clearly and understand native speakers. Mispronunciation can lead to misunderstandings, making sound recognition crucial. The “Racontes-moi les sons” PDF emphasizes this by providing detailed phonetic instructions, ensuring learners grasp the nuances of French intonation and rhythm. Understanding French sounds also aids in spelling and reading, as many words are phonetically consistent. Additionally, it enriches cultural immersion, allowing learners to connect deeply with French-speaking communities. By prioritizing phonetic accuracy, learners can build a strong foundation for advanced language skills, making it a vital aspect of French language acquisition.

Phonetic Basics of the French Language

French phonetics involves 36 distinct sounds, including 16 vowels and 20 consonants. Mastery of these sounds is fundamental for accurate pronunciation and comprehension, as outlined in the guide.

Vowels in French

French vowels are categorized into oral and nasal types, totaling 16 phonemes. Oral vowels include sounds like /i/, /e/, /a/, /o/, /u/, and /y/, each with distinct pronunciations. Nasal vowels, such as /ɛ̃/, /ɔ̃/, and /œ̃/, are produced with air flowing through the nasal cavity. Examples of oral vowels include i in “ami” and u in “loup,” while nasal vowels are heard in words like “vin” and “un.” Understanding these vowels is crucial for accurate pronunciation, as they significantly affect word meaning. The guide provides detailed exercises to help learners master these sounds, including audio examples and pronunciation tips. This focus on vowels aligns with the broader goal of the PDF: to enhance phonetic awareness and improve French language proficiency through practical, interactive learning tools.

Consonants in French

French consonants are divided into stops, fricatives, and nasals. Stops like /p/ and /b/ are common, while fricatives such as /s/ and /z/ involve air flow. Nasal consonants like /m/ and /n/ use nasal resonance. Some consonants, like the ‘d’ in “bord,” are silent, while others, like ‘s’ in “bois,” are pronounced. The guttural ‘r’ sound is unique to French. These consonants are essential for accurate pronunciation, affecting word meaning and comprehension. The guide offers exercises and examples to help master these sounds, enhancing overall French proficiency.

Classification of French Sounds

French sounds are categorized into 36 phonemes, including oral and nasal vowels, and consonants like stops, fricatives, and nasals, each vital for precise pronunciation and comprehension.

Oral and Nasal Vowels

French vowels are divided into two main categories: oral and nasal. Oral vowels, such as /i/, /e/, /a/, /o/, /u/, /y/, and /ø/, are produced without nasal resonance. They are further classified into acute and grave sounds, differing in tongue position and mouth opening. Nasal vowels, including /ɛ̃/, /ɑ̃/, /ɔ̃/, and /œ̃/, are produced with air flowing through the nasal cavity, giving them a distinct timbre. These vowels are crucial for accurate pronunciation, as they significantly affect word meaning. For example, vin (wine) uses an oral /i/, while vin with a nasal /ɛ̃/ would alter the meaning entirely. Understanding and mastering both oral and nasal vowels is essential for achieving native-like speech in French.

Stop, Fricative, and Nasal Consonants

French consonants are categorized into stops, fricatives, and nasals, each with distinct articulations. Stop consonants, such as /p/, /t/, /k/, /b/, /d/, /ɡ/, are produced by blocking airflow with the tongue or lips. Fricatives, like /f/, /v/, /s/, /z/, /ʃ/, /ʒ/, /ʁ/, involve directing air through narrow channels, creating friction. Nasal consonants, including /m/, /n/, /ɲ/, are articulated with air flowing through the nasal cavity. These sounds are vital for clear pronunciation, as they distinguish word meanings. For example, pain (bread) uses a nasal /ɛ̃/, while pein (a less common term) uses an oral vowel. Correct articulation of these consonants enhances speech clarity and helps learners avoid common pronunciation errors in French.

The International Phonetic Alphabet (IPA)

The IPA is a standardized system for transcribing sounds in any language. Created in 1888, it assigns unique symbols to each sound, aiding in consistent French pronunciation and comprehension.

Role of IPA in Transcribing French Sounds

The International Phonetic Alphabet (IPA) plays a crucial role in accurately transcribing French sounds, ensuring clarity and consistency in pronunciation. It provides a standardized method for representing each phoneme with distinct symbols, making it easier for learners to grasp complex French sounds. By using IPA, users can decode and reproduce sounds precisely, overcoming challenges like nasal vowels and consonant variations. This system is particularly beneficial for non-native speakers, offering a visual guide to master intonation and rhythm. The IPA’s role is emphasized in the “Racontes-moi les sons” PDF, which integrates IPA transcriptions to help learners recognize and mimic French phonemes effectively, enhancing their overall language proficiency.

Common IPA Symbols for French Phonemes

The “Racontes-moi les sons” PDF highlights essential IPA symbols for French phonemes, helping learners master pronunciation. Key symbols include /i/ (as in “vi”), /u/ (as in “vous”), and /a/ (as in “père”). Nasal vowels are represented by /ɑ̃/ (e.g., “sang”) and /ɛ̃/ (e.g., “vin”). Consonant symbols like /p/ (as in “pain”) and /ʁ/ (the guttural “r”) are also covered. These symbols provide a clear visual guide, allowing learners to distinguish and reproduce sounds accurately. By familiarizing themselves with these IPA representations, users can improve their pronunciation and comprehension of French phonemes, making the learning process more systematic and effective. This approach bridges the gap between written and spoken French, ensuring a stronger grasp of the language’s unique sounds.

Pronunciation Tips and Tricks

Practice listening to native speakers and mimic their intonation. Use a mirror to observe mouth movements. Record yourself to track progress and refine difficult sounds regularly.

Mastering French Intonation and Rhythm

Mastering French intonation and rhythm is crucial for sounding natural. Practice listening to native speakers to mimic their stress patterns and melodic flow. French rhythm is syllable-timed, unlike English, which is stress-timed. Pay attention to how words blend in sentences. Use online resources or language apps to practice intonation exercises. Record yourself speaking and compare with native speakers. Focus on rising and falling pitch in questions and statements. Practice rhythm by reading aloud with a metronome. Exercises in “Racontes-moi les sons” PDF include audio clips and drills to refine intonation. Regular practice will help you internalize these patterns, improving your overall pronunciation and comprehension skills in French.

Common Challenges for Non-Native Speakers

Non-native speakers often struggle with French sounds like nasal vowels and specific consonants. Mastering the “u” and “r” sounds is particularly difficult. Many confuse similar vowels, such as /e/ and /ɛ/. Intonation patterns also pose challenges, as French rises and falls differ from other languages. Silent letters and liaisons can be tricky, as they require understanding context. Pronouncing words with accents and diacritics adds complexity. The “Racontes-moi les sons” PDF addresses these issues with targeted exercises and audio examples. Regular practice with interactive tools helps build confidence and accuracy. Overcoming these challenges requires consistent effort and exposure to native speech, making the guide an invaluable resource for learners aiming to refine their French pronunciation skills effectively.

Resources and Exercises

The “Racontes-moi les sons” PDF offers diverse exercises, audio aids, and interactive tools to enhance French sound recognition and pronunciation, ensuring effective learning and practical application.

Recommended PDF Materials for Learning

Several PDF resources complement “Racontes-moi les sons” by providing in-depth phonetic studies. These include detailed vowel and consonant charts, IPA transcriptions, and practical exercises. They cater to both beginners and advanced learners, offering clear explanations and audio aids for better sound recognition. Additionally, materials like “Facile à Dire!” and “Les Sons du Français” offer comprehensive guides to French phonetics, complete with examples and drills. These resources are ideal for self-study or classroom use, ensuring a thorough understanding of French pronunciation. They are easily accessible online, making learning convenient and engaging for all language enthusiasts.

Interactive Exercises for Sound Recognition

The “Racontes-moi les sons” PDF includes engaging interactive exercises designed to enhance sound recognition skills. These activities range from audio-based listening tasks to fill-in-the-blank exercises, helping learners identify and reproduce French phonemes accurately. Users can practice distinguishing between similar sounds, such as oral and nasal vowels, through targeted drills. The PDF also incorporates pronunciation guides and matching games, making learning fun and effective. Many exercises are accompanied by audio clips, allowing learners to hear and mimic native speaker intonation. Additionally, interactive quizzes and flashcards reinforce sound recognition in a dynamic way. These tools are particularly useful for self-study, enabling learners to track their progress and improve their phonetic skills independently.

The “Racontes-moi les sons” PDF is an essential guide for mastering French phonetics, offering a comprehensive approach to understanding and reproducing French sounds effectively.

Final Thoughts on Learning French Phonetics

Mastering French phonetics is a rewarding journey that enhances language proficiency. The “Racontes-moi les sons” PDF provides a structured approach to understanding and reproducing French sounds. By focusing on vowels, consonants, and intonation, learners can improve pronunciation and comprehension. Regular practice with IPA transcriptions and interactive exercises is key to success. Non-native speakers often face challenges with nasal vowels and specific consonant sounds, but consistent effort yields progress. Listening to native speakers and mimicking their intonation can further refine skills. This guide serves as an invaluable resource, offering clear explanations and practical tools. With dedication and the right techniques, anyone can achieve fluency in French phonetics and communicate confidently.

technical communication mike markel 13th edition pdf free

Overview of the 13th Edition

The 13th edition of Technical Communication by Mike Markel offers clear, practical advice and real-world examples, preparing students for workplace writing. It bridges academic and professional environments effectively, focusing on digital trends and communication strategies.

Mike Markel’s Technical Communication is a renowned textbook designed to bridge the gap between academic writing and professional communication. The 13th edition focuses on practical strategies, real-world examples, and ethical considerations, making it a comprehensive guide for students and professionals. Markel’s approach emphasizes clarity, accessibility, and relevance, ensuring readers can apply the principles immediately. The book’s structured format and student-friendly tone make it an essential resource for understanding the complexities of technical communication in diverse workplace settings.

Key Features of the 13th Edition

The 13th edition of Mike Markel’s Technical Communication stands out with its enhanced focus on digital trends, interactive elements, and updated case studies. It includes practical advice on document design, collaboration tools, and ethical considerations. The book also offers downloadable resources, making it more accessible for modern learners. New chapters emphasize the challenges of communication in a rapidly evolving workplace, ensuring students are well-prepared for real-world scenarios. These features collectively provide a robust learning experience tailored to contemporary technical communication needs.

Download and Access Information

The 13th edition of Technical Communication by Mike Markel is available as a downloadable ebook from Macmillan Learning. It offers more than a basic PDF, providing interactive features for enhanced learning. Students can also opt for hardcopy versions with free shipping, ensuring accessibility and convenience for all learners.

Where to Find the Free PDF Version

The free PDF version of Technical Communication by Mike Markel can be found on various online platforms. Websites like Macmillan Learning offer downloadable ebooks, though they may require purchase for full access. Additionally, platforms such as Archive.org or educational forums occasionally host free PDF versions, though their availability and legality may vary. Always ensure you are accessing the material from reputable sources to avoid copyright infringement and support the authors and publishers.

Official Sources for Download

The 13th edition of Technical Communication by Mike Markel can be officially downloaded from Macmillan Learning and Bedford/St. Martins. These platforms offer downloadable ebooks, ensuring access to the latest content. Visit the official website or authorized retailers to purchase and download the ebook legally. This supports the authors and ensures you receive a high-quality, complete version of the textbook. Always prioritize official sources to avoid incomplete or unauthorized copies.

Content and Structure

The 13th edition of Technical Communication by Mike Markel covers workplace writing, digital trends, and practical strategies. It includes real-world examples, interactive cases, and a student-friendly approach to teach effective communication skills.

Major Topics Covered in the 13th Edition

The 13th edition of Mike Markel’s Technical Communication covers essential topics such as workplace writing, digital communication, and ethical considerations. It emphasizes practical strategies for creating effective documents, collaborating with teams, and adapting to diverse audiences. The text also explores the latest trends in technical communication, including the use of social media, visual design, and multimedia tools. Real-world examples and interactive cases provide hands-on practice, helping students transition smoothly from academic to professional environments. The edition is structured to address the evolving demands of the modern workplace.

Practical Examples and Case Studies

The 13th edition includes numerous practical examples and real-world case studies, providing students with hands-on experience in technical communication. These examples cover various industries and scenarios, such as creating user manuals, drafting proposals, and designing presentations. Interactive cases allow students to analyze and solve problems, enhancing their critical thinking and application skills. The inclusion of diverse workplace contexts ensures that learners are well-prepared to address challenges in their future careers, making the textbook a valuable resource for both education and professional development.

Importance in Technical Communication

Technical Communication is essential for bridging academic and professional environments, emphasizing clear, precise writing in workplace settings. It equips students and professionals with skills to adapt to industry demands effectively.

Relevance in Workplace Settings

The 13th edition of Mike Markel’s Technical Communication is highly relevant in workplace settings, offering practical strategies for tackling various types of documents and writing situations. It emphasizes clear advice, accessible design, and includes real-world examples from a range of sources, preparing students to write in professional environments. The text focuses on collaboration, ethical considerations, and the latest workplace trends, making it an essential resource for professionals and students transitioning into industry roles. Its emphasis on digital communication and adaptability to industry standards ensures its relevance in modern workplaces.

Focus on Digital Trends and Communication

The 13th edition of Mike Markel’s Technical Communication emphasizes the importance of adapting to digital trends in workplace communication. It provides updated advice on leveraging social media, collaborative tools, and digital platforms for effective technical communication. The text incorporates real-world examples and interactive cases to illustrate how digital tools enhance clarity and efficiency in professional settings. By focusing on modern communication strategies, the book prepares students to navigate the evolving digital landscape and apply practical solutions in their future careers.

Differences from Previous Editions

The 13th edition introduces updated workplace scenarios, expanded digital communication strategies, and enhanced interactive examples, distinguishing it from earlier versions with a stronger emphasis on modern tools and practices.

Upgrades and New Features in the 13th Edition

The 13th edition of Technical Communication by Mike Markel includes enhanced digital communication strategies, updated workplace scenarios, and expanded interactive examples. These upgrades reflect contemporary workplace challenges and technological advancements, providing students with practical tools for real-world applications. The edition emphasizes accessible design and a student-friendly voice, ensuring clarity and engagement. New features incorporate the latest trends in communication, such as social media and collaborative platforms, preparing students for diverse professional environments. This edition also offers downloadable resources for enhanced learning experiences.

Comparison with the 12th Edition

The 13th edition of Technical Communication by Mike Markel builds on the foundation of the 12th edition, enhancing its practical approach with updated content. While the 12th edition focused on workplace writing strategies, the 13th edition expands on digital communication trends and interactive examples. It introduces new chapters on modern workplace challenges, such as remote collaboration and social media integration, making it more relevant to contemporary professional environments. The 13th edition also improves accessibility with a student-friendly design, ensuring clarity and engagement for learners.

Supplementary Resources

Supplementary resources include test banks, instructor manuals, and lecture slides, providing comprehensive support for instructors and students alike in mastering technical communication skills effectively online.

Test Banks and Instructor Manuals

Test banks and instructor manuals for the 13th edition are available to support educators in delivering effective technical communication courses. These resources include comprehensive question banks, lesson plans, and grading guidelines to streamline instruction. Manuals provide detailed insights into course setup, while test banks offer diverse assessment options. Both resources are downloadable in formats like PDF and ZIP, ensuring accessibility and flexibility for instructors. They are designed to align with the textbook’s focus on practical skills and real-world applications, enhancing the teaching and learning experience significantly. These tools are essential for instructors aiming to maximize student engagement and outcomes effectively.

Lecture Slides and Additional Materials

Lecture slides for the 13th edition are available in downloadable ZIP format, providing instructors with structured visual aids to deliver course content effectively. Additional materials include interactive cases, exercises, and supplementary resources that enhance teaching and learning. These tools are designed to align with the textbook’s focus on practical communication skills, offering real-world examples and scenarios. Instructors can use these materials to create engaging lessons and assessments, ensuring students gain hands-on experience in technical communication. These resources are indispensable for fostering an interactive and dynamic learning environment, making complex concepts more accessible and relatable for students. They complement the textbook by providing diverse teaching strategies and materials that cater to various learning styles, ensuring comprehensive understanding and application of key concepts in technical communication. These additional resources are regularly updated to reflect current trends and methodologies, keeping the curriculum relevant and effective in preparing students for professional challenges. By incorporating these materials, educators can create a well-rounded and impactful educational experience that goes beyond traditional teaching methods, encouraging active participation and deeper engagement with the subject matter. Ultimately, these resources serve as valuable extensions of the textbook, enriching both teaching and learning experiences in technical communication education. They are essential for instructors seeking to enhance student outcomes and prepare them for the demands of modern workplace communication, ensuring that learners are well-equipped with the skills and knowledge needed to excel in their future careers. The availability of these materials underscores the commitment to providing educators with comprehensive support, enabling them to deliver high-quality instruction that meets the evolving needs of students in technical communication courses. By leveraging these resources, instructors can create a cohesive and effective learning environment that fosters intellectual growth and practical skill development, ultimately preparing students to succeed in a variety of professional settings. The combination of lecture slides and additional materials offers a robust framework for teaching technical communication, ensuring that both instructors and students have access to the tools they need to achieve their educational goals. These resources are a testament to the dedication of educators and publishers in providing innovative and effective learning solutions that address the complexities of modern technical communication, making them an invaluable asset for any technical communication course. By integrating these materials into their curriculum, instructors can ensure that their students receive a well-rounded education that prepares them for the challenges of the digital workplace, where effective communication is paramount. The inclusion of these resources highlights the importance of adaptability and innovation in education, ensuring that technical communication courses remain relevant and impactful in an ever-changing professional landscape. As such, these materials are not just supplementary but essential components of a comprehensive educational strategy aimed at fostering excellence in technical communication. They provide instructors with the flexibility to tailor their teaching methods to meet the diverse needs of their students, creating a personalized and effective learning experience that maximizes student potential. In conclusion, the lecture slides and additional materials for the 13th edition of “Technical Communication” by Mike Markel are indispensable tools that enhance the teaching and learning process, ensuring that students are well-prepared to navigate the complexities of professional communication in the modern workplace.

Legal Considerations

Downloading Technical Communication without authorization may violate copyright laws. Purchasing official copies ensures compliance with legal standards and supports intellectual property rights, avoiding potential legal consequences.

Copyright and Legal Implications of Downloading

Downloading Technical Communication without proper authorization violates copyright laws. Copyright holders, including authors and publishers, are legally protected against unauthorized distribution. Sharing or downloading pirated copies can lead to legal consequences, including fines and penalties. Respect for intellectual property is crucial, as it supports authors and ensures the quality and authenticity of educational materials. Always opt for official sources to avoid legal risks and contribute to fair practices in academic and professional publishing.

Importance of Purchasing Official Copies

Purchasing official copies of Technical Communication ensures access to high-quality, authentic content, free from errors and unauthorized modifications. It supports authors and publishers, promoting the creation of future educational resources. Official copies often include supplementary materials like lecture slides and test banks, enhancing learning experiences. Buying legally also respects copyright laws, avoiding potential legal consequences. Investing in official sources guarantees reliability and contributes to the sustainability of academic publishing. Always choose reputable sellers like Macmillan Learning for secure and ethical access.

The 13th edition of Technical Communication by Mike Markel is a vital resource for students and professionals, offering practical insights and real-world examples. Accessing it legally ensures quality and supports ethical publishing practices.

Final Thoughts on the 13th Edition

The 13th edition of Technical Communication by Mike Markel stands out as a comprehensive guide, blending practical advice with real-world examples. It effectively bridges the gap between academic writing and professional communication, making it an indispensable tool for students transitioning into the workplace. The text emphasizes clarity, accessibility, and relevance, ensuring readers are well-equipped to navigate the evolving landscape of technical communication. Its focus on digital trends and ethical considerations further enhances its value, solidifying its reputation as a leading resource in the field.

Encouragement for Legal Access

Purchasing the official 13th edition of Technical Communication ensures access to high-quality, complete content while supporting the authors and publishers. Official sources provide interactive features, updates, and enhanced learning tools. Using unauthorized PDFs risks legal consequences, incomplete content, and outdated information. Investing in a legitimate copy promotes academic integrity and supports the creation of future educational resources. It also guarantees a seamless and secure learning experience, free from potential malware or privacy concerns associated with illegal downloads.

schwinn bicycle manual

Schwinn bicycle manuals serve as essential guides for owners, providing detailed instructions on safety, maintenance, and model-specific features. Available online as downloadable PDFs, they ensure seamless access to vital information for optimal performance and longevity of your Schwinn bike.

Importance of Reading the Manual

Reading the Schwinn bicycle manual is crucial for ensuring safe and optimal use of your bike. It provides essential safety precautions, assembly instructions, and maintenance tips. Understanding the manual helps riders identify potential hazards and proper usage, reducing the risk of accidents. Additionally, it outlines troubleshooting steps for common issues, saving time and effort. The manual also details warranty information and maintenance schedules, helping extend the bike’s lifespan. Ignoring the manual may lead to improper assembly or maintenance, potentially voiding the warranty or causing safety risks. Always refer to the manual before riding to ensure a smooth and secure cycling experience.

Types of Schwinn Bicycle Manuals Available

Schwinn offers a variety of manuals tailored to different bike models and user needs. These include assembly manuals, owner’s guides, and service manuals. Assembly manuals provide step-by-step instructions for building your bike, while owner’s guides cover operation, safety, and maintenance. Service manuals are designed for more advanced users and mechanics, detailing repair and troubleshooting procedures. Each manual is specific to the bike model, ensuring relevance and accuracy. They are available in PDF format on the Schwinn website and other online platforms, making them easily accessible for download. Whether you’re assembling, maintaining, or repairing your Schwinn bike, there’s a manual to guide you through the process effectively.

Understanding Your Schwinn Bicycle

Understanding your Schwinn bicycle involves familiarizing yourself with its components, features, and proper setup. The manual helps you identify key parts, such as frames, gears, and brakes, ensuring optimal performance and safety.

Key Components of Schwinn Bicycles

The key components of Schwinn bicycles include the frame, wheels, gears, brakes, pedals, and seat. The frame provides structural integrity, while the wheels ensure smooth movement. Gears enable speed adjustments, and brakes are crucial for safe stopping. Pedals drive the bike forward, and the seat offers comfort during rides. Proper maintenance of these components, as outlined in the manual, ensures optimal performance and longevity of your Schwinn bicycle.

Model-Specific Features and Specifications

Schwinn bicycles offer a variety of model-specific features tailored to different riding styles. From road bikes with lightweight frames and advanced gearing to mountain bikes with durable suspension systems, each model is designed for specific terrains. Indoor cycling bikes, such as the Schwinn IC2 and IC4, feature ergonomic designs and adjustable resistance for home workouts. Recumbent and upright bikes prioritize comfort, while folding bikes emphasize portability. Manuals detail these features, ensuring riders understand their bike’s unique capabilities, such as gear ratios, brake systems, and additional accessories, enhancing their overall riding experience and performance.

Assembly and Installation Instructions

The Schwinn bicycle manual provides clear guidance for assembling and installing components like handlebars, pedals, and seats. It outlines required tools and materials for a smooth setup process.

Step-by-Step Assembly Guide

The Schwinn bicycle manual includes a detailed step-by-step guide to help users assemble their bikes efficiently. It starts with unpacking and inventorying parts, ensuring all components are accounted for. Next, the manual instructs on attaching the handlebars, installing the front wheel, and securing the seatpost. Pedal installation is covered, emphasizing proper tightening to avoid damage. The guide also addresses brake system setup, ensuring safe and effective stopping power. Finally, it concludes with a thorough inspection checklist to confirm everything is correctly assembled. This structured approach ensures a smooth and stress-free assembly process for riders of all skill levels.

Tools and Materials Required

Assembling your Schwinn bicycle requires specific tools to ensure a safe and accurate setup. Essential tools include a 4mm, 5mm, and 6mm Allen wrench for adjusting bolts and screws. A screwdriver (both Phillips and flathead) is necessary for various components. Additionally, a torque wrench is recommended for precise tightening to avoid damage. Other tools may include a tire lever for wheel installation, a pump or CO2 inflator for tire inflation, and a chain breaker for sizing the chain. Ensure all parts from the box are included, and refer to the manual for any model-specific tools. Proper preparation ensures a smooth assembly process.

Safety Guidelines and Precautions

Always read the manual before riding. Wear safety gear, inspect brakes, and ensure proper bike fit. Regular maintenance prevents accidents and ensures optimal performance.

Essential Safety Checks Before Riding

Before every ride, perform a thorough safety check to ensure your Schwinn bicycle is in optimal condition. Inspect the brakes for proper function and wear. Check tire pressure and tread for sufficient grip. Verify the chain is clean, lubricated, and securely attached. Ensure all bolts and quick releases are tightened to the recommended torque. Examine the frame and fork for any signs of damage or corrosion. Test the gears and derailleurs for smooth shifting. Make sure all accessories, such as lights or racks, are securely attached. Always wear safety gear, including a helmet. Regular maintenance and pre-ride checks are crucial to prevent accidents and ensure a safe riding experience.

Proper Riding Techniques and Etiquette

Mastering proper riding techniques and etiquette is vital for a safe and enjoyable experience on your Schwinn bicycle. Always wear a helmet and ensure it is securely fastened. Use hand signals to communicate your intentions to others on the road. Ride in the same direction as traffic and stay within designated bike lanes when available. Be visible by wearing bright or reflective clothing, especially at dawn, dusk, or night. Avoid distractions like using your phone while riding. Respect pedestrian paths and yield to walkers when necessary. Follow all traffic laws, including stopping at red lights and stop signs. Maintain a clean and well-maintained bike to ensure reliability and safety. By adhering to these guidelines, you contribute to a courteous and safe cycling environment for everyone.

Maintenance and Care Tips

Regularly inspect tires, brakes, and chains. Lubricate moving parts and keep the bike clean. Schedule professional tune-ups annually for optimal performance and longevity.

Regular Maintenance Routines

Regular maintenance ensures your Schwinn bicycle performs optimally and lasts longer. Start with weekly tire pressure checks and brake inspections. Lubricate the chain and moving parts monthly. Clean the bike after rides, especially in wet conditions. Inspect cables and gears for wear. Replace worn parts promptly. Schedule a professional tune-up annually for thorough servicing. Follow the manual’s guidelines for specific models, such as indoor cycling bikes or ellipticals. Proper care prevents mechanical issues and enhances safety. Always refer to your Schwinn manual for detailed routines tailored to your bike type.

Troubleshooting Common Issues

Troubleshooting common issues with your Schwinn bicycle begins with identifying the problem. Check for loose bolts, worn brake pads, or misaligned gears. For gear malfunctions, ensure the derailleur is properly aligned. If brakes are weak, adjust the cable tension. Electronic consoles may require resetting or battery replacement. Lubricate squeaky parts and tighten any rattling components. Refer to the manual for specific diagnostic steps. Addressing issues promptly prevents further damage. Regular inspections can help identify problems early. Always follow the manufacturer’s guidelines for repairs. If unsure, consult a professional to ensure safety and proper functionality. Troubleshooting ensures your bike remains in optimal condition for years of reliable use.

Downloading and Accessing Manuals

Schwinn bicycle manuals are available for free download as PDFs on the official Schwinn website or platforms like ManualsLib. Adobe Reader is required to view them.

Where to Find Schwinn Bicycle Manuals Online

Schwinn bicycle manuals can be easily accessed online through the official Schwinn website or platforms like ManualsLib. These websites offer free PDF downloads for various Schwinn bike models, including assembly, maintenance, and troubleshooting guides. Simply visit the site, search for your specific model, and download the manual. Additionally, third-party sites may host Schwinn manuals, ensuring wide availability. Always verify the source for authenticity and safety. Ensure you have Adobe Reader installed, as manuals are typically in PDF format. This convenient access allows riders to maintain and enjoy their Schwinn bicycles with ease and confidence.

How to Navigate and Use the PDF Manuals

To navigate Schwinn bicycle PDF manuals, start by downloading the specific model from the official website or trusted sources like ManualsLib. Open the PDF using Adobe Reader, which is typically required. Use the table of contents or bookmarks to quickly locate sections like assembly instructions, maintenance routines, or troubleshooting guides. Zoom in for detailed views of diagrams or small text. The search function can help find specific topics instantly; Ensure to read safety guidelines thoroughly before starting any task. Save or print the manual for easy reference. Familiarize yourself with the layout to make the most of your Schwinn biking experience;

e-flight umx turbo timber manual

The E-flite UMX Turbo Timber is a high-performance, ultra-micro radio-controlled aircraft designed for intermediate to advanced pilots․ It features AS3X® technology for smoother flights and SAFE® Select for enhanced stability․ With its durable, STOL-capable design, it excels in various flying conditions, offering an exciting blend of sport and scale flight experiences․

Key Features and Specifications

The E-flite UMX Turbo Timber is a compact, lightweight, and highly capable ultra-micro aircraft designed for intermediate to advanced pilots․ It features a durable, reinforced airframe with a length of 467 millimeters and a wingspan of 700 millimeters․ Weighing just 121 grams, it combines portability with impressive performance․ The aircraft is equipped with the innovative AS3X® system, which provides stability and smooth flight characteristics, while SAFE® Select technology offers multiple flight modes to suit different skill levels․

  • Length: 467 mm
  • Wingspan: 700 mm
  • Weight: 121 grams
  • AS3X® System: Enhances stability and reduces effects of turbulence
  • SAFE® Select Technology: Offers multiple flight modes, including SAFE On and AS3X On
  • STOL Capability: Short Takeoff and Landing performance for versatile flying
  • Reinforced Airframe: Durable construction for better resilience
  • 2S and 3S Compatibility: Supports a range of battery options
  • Wing Area: 767․7 square centimeters for stable and maneuverable flight

These features make the UMX Turbo Timber an excellent choice for pilots seeking a balance between agility and stability in a compact, easy-to-handle design․

E-flite UMX Turbo Timber Manual Overview

The manual provides essential guidelines for safe operation, maintenance, and troubleshooting․ It includes pre-flight checks, binding instructions, and detailed specifications․ Updated models feature improved ESC and receiver systems․ Refer to the manual for comprehensive support and the latest product information․

Pre-Flight and Safety Information

Before operating the E-flite UMX Turbo Timber, thoroughly review the manual to understand its features and operation․ Conduct a detailed pre-flight inspection to ensure all components, including the airframe, control surfaces, and electronics, are in proper working condition․ Charge the battery fully and avoid overcharging to prevent damage․ Always use a LiPo battery charger specifically designed for lithium-polymer batteries․

Choose a wide, open area free from obstacles, people, and radio interference for flying․ Ensure the transmitter is properly configured and perform a range check as specified in the manual․ Calibrate the throttle and control surfaces to ensure smooth and precise operation․ Be cautious of the flap system, as improper handling can lead to reduced performance or potential damage;

Adhere to all safety guidelines to prevent accidents․ Avoid flying near bystanders or in confined spaces․ Keep the aircraft within line of sight and maintain control at all times․ In case of any issues, refer to the troubleshooting section of the manual for guidance․ Always follow local aviation regulations and best practices for safe and responsible flying․

Binding and Configuration Instructions

Binding the E-flite UMX Turbo Timber involves connecting the transmitter to the receiver․ Ensure compatibility between your transmitter and receiver․ Enter bind mode by pressing and holding the bind button on the receiver while powering it on․ The LED will flash, indicating binding mode․ Turn on the transmitter, and the LED will stop flashing once bound․

Configure channels by assigning controls to the transmitter sticks․ Typically, the left stick controls throttle and rudder, while the right stick controls ailerons and elevator․ Use the transmitter’s menu to adjust settings like dual rates and expo for control sensitivity․ Refer to the manual for specific instructions on enabling SAFE Select technology and AS3X modes, which enhance stability and performance․ Assign the flap channel if equipped, and ensure proper calibration for smooth operation․ Perform a range check to verify signal strength and reliability․

SAFE Select Technology

The E-flite UMX Turbo Timber features SAFE (Sensor Assisted Flight Envelope) Select technology, a revolutionary system designed to make flying safer and more enjoyable for pilots of all skill levels․ This advanced technology provides multiple flight modes that can be easily switched using a transmitter or flap channel, allowing pilots to adapt the aircraft’s behavior to their flying style and conditions․

In SAFE Mode, the system restricts the aircraft’s pitch and roll angles, preventing extreme maneuvers and maintaining a stable flight envelope․ This mode is ideal for beginners or when flying in challenging conditions․ The aircraft will self-level when the sticks are centered, reducing the risk of disorientation and loss of control․

AS3X Mode disables the angle limits, allowing for full aerobatic capability while still providing stability enhancements․ This mode is perfect for experienced pilots who want to perform advanced maneuvers while benefiting from the system’s gyroscopic assistance․ The transition between modes is seamless, ensuring a smooth flying experience․

The SAFE Select system also includes a panic recovery feature, which activates by moving the throttle stick to the lowest position and centering the pitch and roll sticks․ This instantly returns the aircraft to a stable, upright position, providing an added layer of safety in emergency situations․ The integration of SAFE Select technology makes the UMX Turbo Timber an excellent choice for both learning and recreational flying․

AS3X System Integration

The E-flite UMX Turbo Timber incorporates the advanced AS3X (Artificial Stabilization – 3-aXis) system, which enhances flight stability and precision by actively countering the effects of turbulence and wind․ This technology is particularly beneficial for pilots flying in challenging conditions or for those transitioning from smaller, less stable aircraft to more capable platforms․

The AS3X system works seamlessly with the SAFE Select technology, providing a natural, responsive flying experience․ By automatically stabilizing the aircraft around its roll, pitch, and yaw axes, AS3X makes the Turbo Timber more forgiving and easier to control, especially during high-speed maneuvers or when flying at low altitudes․

One of the standout features of AS3X integration is its ability to enhance aerodynamic efficiency․ This allows the Turbo Timber to maintain smooth, predictable behavior, even when performing complex aerobatic routines․ The system also ensures consistent performance across a wide range of flying conditions, from calm skies to windy environments․

For intermediate to advanced pilots, AS3X enables a more immersive and rewarding flying experience by allowing precise control while maintaining stability․ This makes the UMX Turbo Timber an excellent choice for pilots looking to improve their skills or enjoy sport flying with added confidence․

Flight Modes and Customization Options

The E-flite UMX Turbo Timber offers versatile flight modes to cater to different piloting preferences and skill levels․ The primary flight modes include the SAFE Select mode, which provides enhanced stability for newer pilots, and the AS3X mode, designed for more experienced flyers seeking a responsive, sport-like experience․ These modes can be easily toggled using the FLAP channel on a 6-channel transmitter, allowing seamless transitions between stability and agility․

Customization options are abundant, enabling pilots to tailor the aircraft’s performance to their preferences․ The transmitter allows adjustments to settings such as throttle, pitch, and roll rates, providing fine control over the aircraft’s behavior․ Additionally, the UMX Turbo Timber features functional flaps, which can be programmed to enhance STOL (Short Takeoff and Landing) capabilities or to modify flight characteristics during takeoff and landing phases․

Pilots can also customize the aircraft’s appearance and functionality by installing optional components, such as LED lights or upgraded landing gear, to suit their flying style and environment․ The aircraft’s durability and adaptability make it an excellent platform for both casual and competitive flying, ensuring a rewarding experience for a wide range of enthusiasts․ For detailed customization instructions, refer to the manual or online support resources provided by E-flite․

Maintenance and Troubleshooting

Regular Maintenance

Regular maintenance is crucial to ensure the E-flite UMX Turbo Timber performs optimally․ Start by inspecting the airframe for damage or wear, especially after flights in rough conditions․ Clean the aircraft with a soft cloth and avoid harsh chemicals that could damage the finish․ Lubricate the control surfaces and hinges periodically to maintain smooth movement․

Check the battery connectors and balance lead for dirt or corrosion․ Properly store the battery in a cool, dry place when not in use to prolong its lifespan․ Ensure all screws and fasteners are secure before each flight to prevent mechanical failures mid-air․

Troubleshooting Common Issues

If the aircraft experiences unexpected behavior, such as loss of control or uneven power, check the transmitter and receiver for proper binding․ Ensure the throttle and control surfaces are calibrated correctly․ For issues with the AS3X or SAFE systems, reset the system by following the instructions in the manual․

For battery-related problems, verify that the battery is fully charged and properly installed․ If issues persist, consult the troubleshooting guide in the manual or contact E-flite support for assistance․ Regular updates to the aircraft’s firmware can also resolve software-related concerns․

For more detailed maintenance and troubleshooting steps, refer to the official E-flite UMX Turbo Timber manual․

Resources and Support

E-flite provides comprehensive resources to support your UMX Turbo Timber experience․ The official manual is available online, offering detailed instructions, specifications, and troubleshooting guides․ For the latest updates, visit Horizon Hobby’s official website and navigate to the support section for this product․

Additional resources include firmware updates for the aircraft’s electronic components, ensuring optimal performance․ E-flite also offers a dedicated FAQ section addressing common questions and issues․ For community support, join forums and discussion groups where pilots share tips, modifications, and flight experiences․

Customer support is readily available through Horizon Hobby’s support team․ Contact them directly for assistance with technical issues or warranty inquiries․ Regular updates and patches are released to enhance functionality, so check the product page frequently for new downloads․

Scan the QR code provided in the manual to access quick links to manuals, support, and firmware updates․ E-flite’s commitment to customer satisfaction ensures you have all the tools needed to enjoy your UMX Turbo Timber to the fullest․

With these resources, you can maintain, troubleshoot, and enhance your aircraft with confidence, backed by E-flite’s reliable support network․

the armor of god priscilla shirer pdf download

The Armor of God, inspired by Ephesians 6:10-18, is a powerful guide by Priscilla Shirer to equip believers for spiritual warfare. This study helps Christians understand the biblical armor, offering practical strategies to stand firm against life’s challenges.

The Biblical Foundation: Ephesians 6:10-18

Ephesians 6:10-18 serves as the biblical cornerstone for understanding the Armor of God. In this passage, the Apostle Paul urges believers to “put on the full armor of God” to withstand spiritual battles. Each piece of armor—such as the belt of truth, breastplate of righteousness, and shield of faith—symbolizes spiritual weapons for combating evil forces. Priscilla Shirer’s teachings emphasize these verses, highlighting their relevance in modern life. The passage reminds Christians that their struggle is not against flesh and blood but against spiritual darkness, making the armor essential for standing firm. By grounding her study in Scripture, Shirer provides a practical guide to applying these ancient truths in contemporary spiritual warfare.

Priscilla Shirer’s Approach to Spiritual Warfare

Priscilla Shirer’s approach to spiritual warfare is rooted in Ephesians 6:10-18, emphasizing the necessity of wearing God’s armor daily. Her study, The Armor of God, is a seven-session video-driven program designed to empower believers to recognize and resist the enemy’s strategies. Shirer uses a combination of biblical teaching, personal anecdotes, and practical application to equip Christians with spiritual weapons; She encourages believers to adopt a proactive stance, understanding that spiritual battles are real and relentless. By focusing on prayer, Scripture memorization, and community support, Shirer’s teachings inspire confidence and resilience. Her approach is both motivational and instructional, offering a clear battle plan for overcoming life’s challenges with faith and courage.

Understanding the Armor of God

The Armor of God, rooted in Ephesians 6:10-18, consists of six spiritual pieces: truth, righteousness, peace, faith, salvation, and the Word of God, empowering believers to stand firm in spiritual battles.

The Six Pieces of Armor: A Detailed Overview

The Armor of God, as outlined in Ephesians 6:10-18, consists of six essential pieces: the belt of truth, breastplate of righteousness, shoes of peace, shield of faith, helmet of salvation, and the sword of the Spirit. Each piece serves a unique purpose in spiritual warfare. The belt of truth represents honesty and integrity, holding all other armor in place. The breastplate of righteousness protects the heart, symbolizing a life lived morally. The shoes of peace prepare believers to share the gospel confidently. The shield of faith deflects spiritual attacks, while the helmet of salvation guards the mind, ensuring security in Christ. Finally, the sword of the Spirit, the Word of God, is the only offensive weapon, used to combat lies and tempting thoughts. Together, these pieces empower believers to stand firm against the enemy.

Practical Application in Modern Life

Priscilla Shirer’s teachings on the Armor of God emphasize its relevance in modern life, helping believers navigate daily challenges. The armor is not just a biblical concept but a practical tool for overcoming stress, anxiety, and spiritual attacks. By wearing the belt of truth, individuals can stay grounded in honesty and integrity, countering lies and deceit. The breastplate of righteousness guides ethical decisions, while the shoes of peace enable believers to share the gospel confidently. The shield of faith protects against negative thoughts, and the helmet of salvation secures trust in God’s plan. The sword of the Spirit, the Word of God, equips individuals to combat tempting thoughts and lies. This study encourages applying these principles in everyday life, fostering resilience and spiritual growth. The downloadable PDF serves as a handy guide for reflection and group discussions, ensuring the armor’s timeless wisdom remains accessible and actionable today.

Priscilla Shirer’s Teachings

Priscilla Shirer’s teachings focus on empowering believers through spiritual warfare insights, offering practical strategies to apply God’s armor in daily life through her comprehensive study.

Key Themes in “The Armor of God” Study

Priscilla Shirer’s study emphasizes spiritual warfare, the power of scripture, and the importance of prayer. It explores the armor metaphor, equipping believers to stand firm against life’s challenges and trust God for victory. The study also highlights the need for community and personal accountability, offering practical steps to apply biblical truths. Shirer’s teachings focus on transforming lives through a deeper understanding of God’s Word and its application in everyday struggles. By breaking down each piece of armor, she provides a clear battle plan for overcoming spiritual battles. This study is designed to empower individuals and groups to live victoriously, rooted in faith and prayer.

Personal Testimonies and Reviews

Many have shared transformative experiences from Priscilla Shirer’s “The Armor of God” study, describing it as life-changing and deeply impactful. Participants often highlight how the study equipped them to face spiritual battles with confidence and clarity. The practical teachings and relatable examples have resonated with individuals from diverse backgrounds, helping them apply biblical truths to everyday challenges. Testimonies frequently mention the study’s ability to deepen faith, strengthen prayer lives, and foster a sense of community. Reviews also praise the accessibility of the PDF materials, which have made it easier for individuals and groups to engage with the content. Overall, the study has been a powerful tool for spiritual growth, leaving a lasting impact on those who have completed it.

Downloading the Study Materials

The Armor of God by Priscilla Shirer is available as a PDF download from various online platforms, including Lifeway and other digital libraries, for easy access.

Accessing the PDF Version

The Armor of God by Priscilla Shirer can be easily accessed in PDF format through various online platforms. Websites like Lifeway and librarybooks.club offer direct downloads. Additionally, the study materials are available on platforms like Timed Popular Library and the Internet Archive. These resources provide convenient access to the PDF version, allowing believers to engage with the study digitally. The PDF format ensures portability and ease of use, making it ideal for personal or group study settings. By downloading the PDF, participants can delve into the teachings and apply the principles of the Armor of God effectively in their daily lives. This accessibility has made the study a popular choice for many seeking to deepen their spiritual understanding and preparation for spiritual warfare.

Additional Resources and Supplements

Engaging with the Study

Engage deeply with Priscilla Shirer’s Armor of God through group sessions, video teachings, and community support. Join thousands online for encouragement and shared spiritual growth.

Group Study Options and Benefits

Engaging in a group study of The Armor of God offers a transformative experience, fostering community and accountability. Priscilla Shirer’s curriculum is designed to be shared, with leader DVD kits and downloadable audio sessions available for group use. Participants benefit from shared insights, prayer support, and mutual encouragement. The study’s structured format allows groups to explore spiritual warfare together, applying biblical truths to real-life challenges. Many churches and women’s ministries have adopted this study, praising its ability to deepen faith and equip believers for daily battles. Group settings also provide opportunities for discussing personal struggles and celebrating victories, creating a bond among participants. Additionally, Shirer’s materials include downloadable resources and printable guides, making it easy for leaders to facilitate meaningful discussions. Group studies are an excellent way to experience the teaching collectively, ensuring no one walks through spiritual warfare alone.

Individual Study Strategies

For those preferring a personal approach, Priscilla Shirer’s The Armor of God study offers flexibility and depth for individual exploration. The downloadable PDF version provides a convenient format for self-paced learning, allowing individuals to reflect on each session privately. Many find value in journaling key insights and biblical truths, while others incorporate prayer and personal reflection to apply the teachings. Shirer’s structured yet adaptable materials encourage individuals to customize their study experience, whether through daily devotionals or focused time with Scripture. Additionally, the availability of free printable resources, such as Scripture memorization cards, enhances personal engagement. This individual approach empowers believers to deepen their faith and develop a personalized strategy for spiritual warfare, ensuring a meaningful and transformative journey through the study. The flexibility of the material makes it accessible for anyone seeking to grow in their understanding of God’s armor.

nashville walking tour self guided

Nashville, known as Music City, offers a unique blend of history, music, and culture. A self-guided walking tour provides flexibility to explore iconic landmarks and hidden gems at your own pace.

1.1 What Makes Self-Guided Tours Unique

Self-guided walking tours in Nashville offer a unique way to explore the city at your own pace, allowing for personalization and flexibility. Unlike traditional guided tours, these experiences let you choose your route, linger at landmarks, and discover hidden gems without time constraints. With the help of GPS-navigated audio guides, you can delve into the city’s history, music, and culture through immersive storytelling. This approach enables you to create a tailor-made adventure, blending iconic sites like the Tennessee State Capitol with local favorites such as street art in The Gulch. Whether you’re a history buff, music enthusiast, or food lover, self-guided tours provide an intimate and memorable connection to Nashville’s vibrant spirit.

1.2 Benefits of Exploring at Your Own Pace

Exploring Nashville at your own pace offers unparalleled flexibility and personalization, allowing you to tailor your experience to your interests. With a self-guided walking tour, you can linger at iconic landmarks like the Tennessee State Capitol or stroll through vibrant neighborhoods like The Gulch without adhering to a rigid schedule. This approach enables you to discover hidden gems, such as local eateries or street art, that might be overlooked on a guided tour. Additionally, the freedom to pause or detour allows for spontaneous moments of discovery, making your adventure truly unique. By setting your own pace, you can fully immerse yourself in Nashville’s rich history, music scene, and cultural offerings, creating a memorable and enriching experience.

Historic Landmarks

Nashville’s historic landmarks, such as the Tennessee State Capitol and Ryman Auditorium, offer a glimpse into the city’s rich political and musical heritage, making them must-visit stops.

2.1 Tennessee State Capitol

The Tennessee State Capitol is a stunning Greek Revival-style building that serves as the seat of state government. Perched on a hill overlooking downtown Nashville, it offers breathtaking views of the city. The Capitol features a prominent central dome and a design inspired by ancient architecture. Visitors can explore its historic chambers, including the Senate and House of Representatives, and learn about Tennessee’s political history. Guided tours are available, providing insight into the building’s significance and the state’s legislative process. The surrounding grounds also include monuments honoring notable Tennesseans, making it a must-visit site for history enthusiasts. This landmark seamlessly blends architectural beauty with historical importance, offering a unique glimpse into the state’s past.

2.2 Ryman Auditorium

The Ryman Auditorium, often called the “Mother Church of Country Music,” is a historic venue that hosted legendary performances by Hank Williams, Patsy Cline, and Johnny Cash. Its iconic stage and acoustics make it a must-visit for music enthusiasts. Nearby, the Country Music Hall of Fame and Museum showcases memorabilia from country music’s greatest stars, offering insights into the genre’s history and evolution. Both landmarks are essential stops on a self-guided tour, providing a deep dive into Nashville’s musical heritage and its enduring impact on American culture. The Ryman’s rich history and significance in shaping country music make it a cornerstone of Music City’s identity, attracting visitors from around the world to experience its legendary ambiance and storied past.

Iconic Neighborhoods

Discover Downtown Nashville and The Gulch, two vibrant areas that showcase the citys rich music scene, trendy vibe, and cultural charm, making them must-explore destinations for any visitor.

3.1 Downtown Nashville

Downtown Nashville is the heartbeat of the city, blending music, history, and culture into a vibrant tapestry. Stroll through the lively streets and explore iconic landmarks like the Ryman Auditorium and Broadway, where live music fills the air. The John Seigenthaler Pedestrian Bridge offers stunning views of the Cumberland River and the city skyline, making it a perfect spot for photos. This area is also home to a variety of restaurants, from Southern comfort food to contemporary cuisine. The energetic atmosphere, rich history, and endless entertainment options make Downtown Nashville a must-visit destination for any self-guided walking tour. Its unique charm and lively vibe provide an unforgettable experience for both locals and visitors.

3.2 The Gulch

The Gulch is a vibrant and trendy neighborhood in Nashville, known for its industrial-chic vibe and thriving arts scene. Once a railroad terminal, this area has transformed into a hotspot for creativity and culture. The Gulch is home to iconic street art, including the famous Wing Dinger Mural, which has become a popular spot for photos. Visitors can explore boutique shops, art galleries, and stylish restaurants, making it a must-visit on any self-guided walking tour. The neighborhood’s dynamic energy, combined with its historical roots, offers a unique blend of past and present. Its walkability and abundance of attractions make the Gulch a favorite among both locals and tourists, providing an unforgettable glimpse into Nashville’s modern identity.

Street Art and Murals

Nashville’s vibrant street art scene transforms the city into an open-air gallery. Discover iconic murals like the Gulch’s Wing Dinger, showcasing the city’s creativity and culture.

4.1 The Gulch’s Wing Dinger Mural

The Gulch’s Wing Dinger mural, created by artist Kelsey Montague, is a iconic landmark in Nashville’s street art scene. This vibrant mural features a pair of angel wings, inviting visitors to interact and take memorable photos. Located in the heart of the Gulch, a trendy neighborhood known for its industrial-chic vibe, the mural has become a symbol of the area’s creativity and energy. The Wings Dinger mural is not only a popular Instagram spot but also a reflection of Nashville’s thriving arts culture. Visitors on a self-guided walking tour can easily stumble upon this masterpiece while exploring the Gulch’s boutique shops, restaurants, and galleries. The mural’s bold design and interactive nature make it a must-see attraction for art lovers and photography enthusiasts alike.

Practical Tips for a Successful Tour

For a seamless experience, use GPS-navigated audio guides to explore Nashville’s landmarks and hidden gems. Plan your route in advance, wear comfortable shoes, and stay hydrated.

5.1 Using GPS-Navigated Audio Guides

Enhance your self-guided Nashville walking tour with GPS-navigated audio guides, offering immersive storytelling and insights into the city’s history, music, and culture. These guides provide turn-by-turn directions, ensuring you never miss a landmark or hidden gem. With narration and music, they bring Nashville’s stories to life, allowing you to explore at your own pace. Download the app, plug in your headphones, and let the city’s vibrant past and present unfold seamlessly as you walk through Music City’s iconic neighborhoods and attractions. This innovative tool combines convenience with depth, making your tour both informative and enjoyable while discovering Nashville’s rich heritage.

5.2 Planning Your Route

Planning your route is essential for a successful self-guided walking tour of Nashville. Start by identifying key landmarks and neighborhoods you wish to explore, such as Downtown Nashville, The Gulch, or Broadway. Use apps like GPSmyCity to create a custom itinerary, balancing must-see attractions with hidden gems. Consider the distance between locations and allocate time for stops at eateries or live music venues. Check the opening hours of indoor sites and plan for breaks to recharge. A well-organized route ensures a smooth and enjoyable experience, allowing you to immerse yourself in Music City’s vibrant culture and history without feeling rushed. This approach lets you make the most of your adventure and discover Nashville’s unique charm at your own pace.

Culinary Highlights

Nashville’s culinary scene is a delicious mix of Southern comfort and modern flavors. Indulge in iconic hot chicken at Hattie B’s, savor upscale dining at Husk, or enjoy hearty breakfasts at Biscuit Love. Don’t miss Goo Goo Clusters, a Nashville treat!

6.1 Must-Try Nashville Eateries

Nashville’s culinary scene is a must-explore part of your self-guided tour. Start with Hattie B’s Hot Chicken, a city staple offering spicy, flavorful dishes. For upscale Southern cuisine, visit Husk Nashville, where locally sourced ingredients shine. Biscuit Love is a breakfast lover’s paradise, serving flaky, buttery biscuits with creative twists. Don’t miss The Southern Steak & Oyster, blending classic steakhouse flavors with Southern charm. For a sweet treat, try Goo Goo Clusters, a Nashville-born candy legend. These eateries capture the city’s culinary spirit, combining tradition with innovation. Whether you’re craving comfort food, fine dining, or local treats, Nashville’s restaurants offer a delicious journey through Music City’s flavors.

Live Music Scene

Nashville, Music City, pulses with live performances. Explore Broadway and Honky Tonk Row for lively country tunes, or visit the Ryman Auditorium and Bluebird Cafe for intimate acoustic sets.

7.1 Honky Tonk Row

Honky Tonk Row, located on Broadway, is the heart of Nashvilles live music scene. This iconic street is lined with neon-lit bars and venues, each offering a unique musical experience. From Tootsies Orchid Lounge to Robert’s Western World, these honky-tonks provide a glimpse into the city’s country music roots. Visitors can enjoy impromptu performances by local artists and up-and-coming musicians. The lively atmosphere, combined with the rich history of these venues, makes Honky Tonk Row a must-visit on any self-guided tour. Whether you’re a country music fan or just exploring, the energy and charm of this area are unforgettable. Be sure to arrive early to secure a spot at the bar and soak in the sounds that define Music City.

A self-guided walking tour of Nashville offers an immersive experience, blending history, music, and culture. By exploring iconic landmarks like the Tennessee State Capitol and Ryman Auditorium, and discovering vibrant neighborhoods such as Downtown and The Gulch, visitors can create a personalized adventure. The flexibility to set your own pace allows for deeper connections with the city’s treasures, from its renowned street art to its lively honky-tonk scene. With practical tips like using GPS-navigated audio guides and planning your route, you’re equipped to make the most of your journey. Whether you’re a history buff, foodie, or music lover, Nashville’s charm awaits. Pack comfortable shoes, stay curious, and embark on an unforgettable exploration of Music City!

crosley record player owner’s manual

Welcome to the Crosley Record Player Owner’s Manual! This guide provides essential information to help you set up, operate, and maintain your record player effectively. Thank you for choosing Crosley, and enjoy your vinyl listening experience!

1.1 Purpose of the Manual

This manual is designed to guide you through the safe and effective use of your Crosley record player. It provides detailed instructions for setup, operation, and maintenance, ensuring you get the best performance from your device. Additionally, it covers troubleshooting tips and warranty information, serving as a comprehensive reference for optimal functionality and longevity of your record player.

1.2 Thank You for Purchasing Crosley Record Player

Thank you for choosing Crosley! Your record player is designed to provide a high-quality vinyl listening experience. With our commitment to innovation and tradition, we aim to bring you the joy of music in its purest form. This manual will help you make the most of your purchase, ensuring years of enjoyable listening.

Safety Precautions and Important Information

Always read this manual carefully before use. Keep the record player away from water and ensure proper ventilation. Follow all safety guidelines to avoid damage or injury.

2.1 General Safety Guidelines

Always follow these guidelines to ensure safe operation. Keep the record player away from water and moisture. Avoid exposure to extreme temperatures or humidity. Ensure proper ventilation and never operate near open flames. Disconnect from power before cleaning or maintenance. Read the manual thoroughly before first use to understand all safety precautions and operating instructions.

2.2 Precautions for Proper Use

For proper use, avoid placing the record player on uneven surfaces. Handle records by the edges to prevent scratches. Use a soft brush to clean the stylus regularly. Ensure the turntable mat is in good condition to protect your records. Never force the tone arm, as this can damage the mechanism. Store records upright in a cool, dry place to maintain their quality and longevity.

2.3 Electrical Safety Tips

Always unplug the record player before cleaning or performing maintenance. Avoid using the device near water or in humid environments. Ensure the power cord is undamaged and properly connected. Never touch electrical components with wet hands. Keep children away from cords and electrical parts. Use only the recommended voltage to prevent damage or electrical hazards. Store the unit in a well-ventilated area to avoid overheating.

Unboxing and Initial Setup

Carefully unpack your Crosley record player, ensuring all components are included. Follow the setup guide to assemble and connect your device for optimal performance.

3.1 What’s Included in the Package

Your Crosley record player package includes the turntable unit, a remote control, a 45-RPM adapter, RCA audio cables, a power cord, and a comprehensive owner’s manual. Additional accessories like a dust cover, stylus, and record cleaning brush may also be provided. Ensure all items are present before proceeding with setup for optimal performance and convenience.

3.2 Step-by-Step Setup Guide

Unpack your Crosley record player carefully and place it on a flat, stable surface. Connect the RCA audio cables to external speakers or systems if desired. Plug in the power cord and ensure the turntable is level. Attach the belt to the motor pulley for models requiring it. Place the mat on the platter and install the tonearm with the provided counterweight. Use the 45-RPM adapter for compatible records.

3.3 Connecting to External Speakers or Systems

Locate the RCA audio output ports on your Crosley record player. Use RCA cables to connect the player to external speakers or systems. Ensure the cables are securely plugged into the corresponding inputs. Turn off both devices before connecting. Power on the record player and external system, then adjust the volume to test the connection and enjoy enhanced sound quality.

Understanding the Components of Your Crosley Record Player

Your Crosley record player features a turntable, tonearm, stylus, motor, and control panel. These components work together to deliver high-quality sound from your vinyl records.

4.1 Overview of the Turntable

The turntable is the heart of your Crosley record player, featuring a rotating platter and a tonearm. It supports 33 1/3 and 45 RPM records, ensuring compatibility with various vinyl formats. The platter is typically made of durable materials, while the tonearm is designed for precise tracking. Regular maintenance, like cleaning and needle replacement, ensures optimal performance and longevity of your records.

4.2 Controls and Features Explained

Your Crosley record player features a speed selector switch for 33 1/3 and 45 RPM records, a tonearm with a cue lever for gentle record placement, and a volume knob for sound adjustment. Additional features include pitch control for fine-tuning speed and built-in speakers for convenient playback. Some models offer Bluetooth connectivity, enhancing versatility and modern functionality while maintaining classic vinyl sound quality.

4.3 Additional Accessories and Parts

Your Crosley record player may come with accessories like a record cleaning kit, 45-RPM adapter, and replacement needles. These items ensure optimal performance and longevity. Additional parts, such as turntable mats or phono cables, can be purchased separately. Always use genuine Crosley accessories to maintain sound quality and prevent damage. Refer to the Crosley website for compatible replacements and enhancements.

Operating the Crosley Record Player

Learn to operate your Crosley record player with ease. This section guides you through playing records, adjusting settings, and using built-in or external speakers for optimal sound quality.

5.1 Playing Your First Record

Congratulations on setting up your Crosley record player! To play your first record, ensure the turntable is stable and clean. Place the record on the turntable, aligning the spindle with the record’s center hole. Use the cue lever to gently lower the tone arm onto the record’s edge. Set the speed to match the record (33 1/3 or 45 RPM) and adjust the volume knob for optimal sound quality. Enjoy your vinyl experience!

5.2 Adjusting Speed and Tone Arm Settings

To ensure optimal playback, adjust the speed setting to match your record’s RPM (33 1/3 or 45). Use the pitch control for fine-tuning; Gently lift the tone arm and place it at the record’s edge. Ensure proper balance by adjusting the counterweight to prevent distortion. Refer to your specific model’s manual, like the CR6007A, for precise instructions on calibration and maintenance.

5.3 Using Built-in Speakers vs. External Speakers

Your Crosley record player features built-in speakers for convenient, portable sound. For enhanced audio quality, connect external speakers using RCA outputs. Built-in speakers are ideal for casual listening, while external systems offer deeper bass and richer tones. Choose the setup that best matches your listening preferences and space requirements for an optimal vinyl experience.

Maintenance and Care for Your Record Player

Regular maintenance ensures optimal performance. Clean the stylus with a soft brush, use a record cleaning solution, and check the needle condition. Avoid liquids near the player and store it in a dry place to preserve longevity and sound quality.

6.1 Cleaning the Turntable and Records

Regular cleaning is essential for maintaining sound quality. Use a soft brush to clean the stylus, moving from back to front. For records, apply a record cleaning solution with a microfiber cloth, wiping in a circular motion. Gently clean the turntable mat and lid with a slightly damp microfiber cloth. Avoid harsh chemicals or excessive moisture to prevent damage.

6.2 Replacing the Needle and Other Parts

Regular needle replacement is crucial for optimal sound quality and to prevent record damage. Turn off and unplug the player before replacing the needle. Gently remove the old stylus and install the new one, ensuring proper alignment. For other parts, refer to the manual for specific instructions. Replace worn or damaged components promptly to maintain performance and longevity of your Crosley record player.

6.3 Regular Maintenance Tips

Dust the turntable and cabinet regularly with a soft cloth to prevent particle buildup. Clean the stylus gently with a soft brush to maintain sound quality. Use a record cleaning brush and solution to remove dust and grease from records. Check the drive belt for wear and replace if necessary. Ensure the motor is clean and free from debris for smooth operation. Store records upright in sleeves to prevent warping and damage.

Troubleshooting Common Issues

Common issues include no sound, distorted audio, or records skipping. Check connections, clean the stylus, and ensure records are free from dust. Replace worn parts if necessary.

7.1 No Sound or Distorted Sound

If your Crosley record player produces no sound or distorted sound, check all connections to ensure they are secure. Verify the volume control is turned up and the stylus is clean. Ensure the tone arm is properly aligned and the record is free from dust. If issues persist, replace the needle or inspect for internal damage. Consult the manual for further guidance or contact customer support.

7.2 Record Not Spinning or Skipping

If your record isn’t spinning or skips frequently, ensure the turntable is placed on a stable surface. Check for debris or dust on the record and clean it with a soft brush. Verify the stylus is undamaged and properly aligned. If skipping continues, adjust the tracking force or replace the stylus. Ensure the motor is functioning correctly and consult the manual for troubleshooting steps.

7.3 General Performance Problems

If you encounter general performance issues, such as poor sound quality or uneven motor operation, check all connections and ensure the turntable is on a stable, level surface. Clean the stylus and records regularly, and verify that the belt is properly aligned. If problems persist, consult the troubleshooting section of this manual or contact Crosley customer support for assistance.

Warranty and Customer Support Information

Your Crosley record player is backed by a limited warranty. For details, visit Crosley’s official website or contact their customer support team for assistance and inquiries.

8.1 Warranty Details and Coverage

The Crosley record player is protected by a limited warranty covering manufacturing defects for a specified period. Visit Crosley’s official website for complete warranty terms, including duration, eligible products, and claim procedures. Proper registration and maintenance are required to ensure coverage. For further assistance, contact Crosley’s customer support directly.

8.2 Contacting Crosley Customer Service

For inquiries or support, contact Crosley Customer Service via their official website or phone support. Visit Crosley.com for contact details and online resources. Ensure to have your product model and serial number ready for efficient assistance. Customer support is available to address warranty claims, troubleshooting, and general product-related questions.

8.3 Online Resources and Manuals

Crosley provides convenient access to online resources, including user manuals and instructional guides, on their official website. Visit Crosley.com to download specific manuals or explore FAQs for troubleshooting. For detailed guides, platforms like ManualsLib offer a wide range of Crosley manuals, ensuring you find the right one for your record player model.